Build a Voice Agent
Create a voice agent with the Deploy Voice Agent wizard — instructions, models, actions, and advanced settings — then test it in the browser.
You create a voice agent from the Voice agents tab of the Deployments page: click Add new deployment, which opens the Deploy Voice Agent side sheet directly — starting from that tab skips the deployment-type picker. The left half is the configuration form; the right half is a Live Preview you can talk to before you deploy.
The form has four tabs — Instructions, AI Models, Actions, Advanced — and a Deploy button in the footer. You can move between tabs freely; validation runs when you deploy, and a failure jumps you to the tab that owns the offending field.
Write the instructions
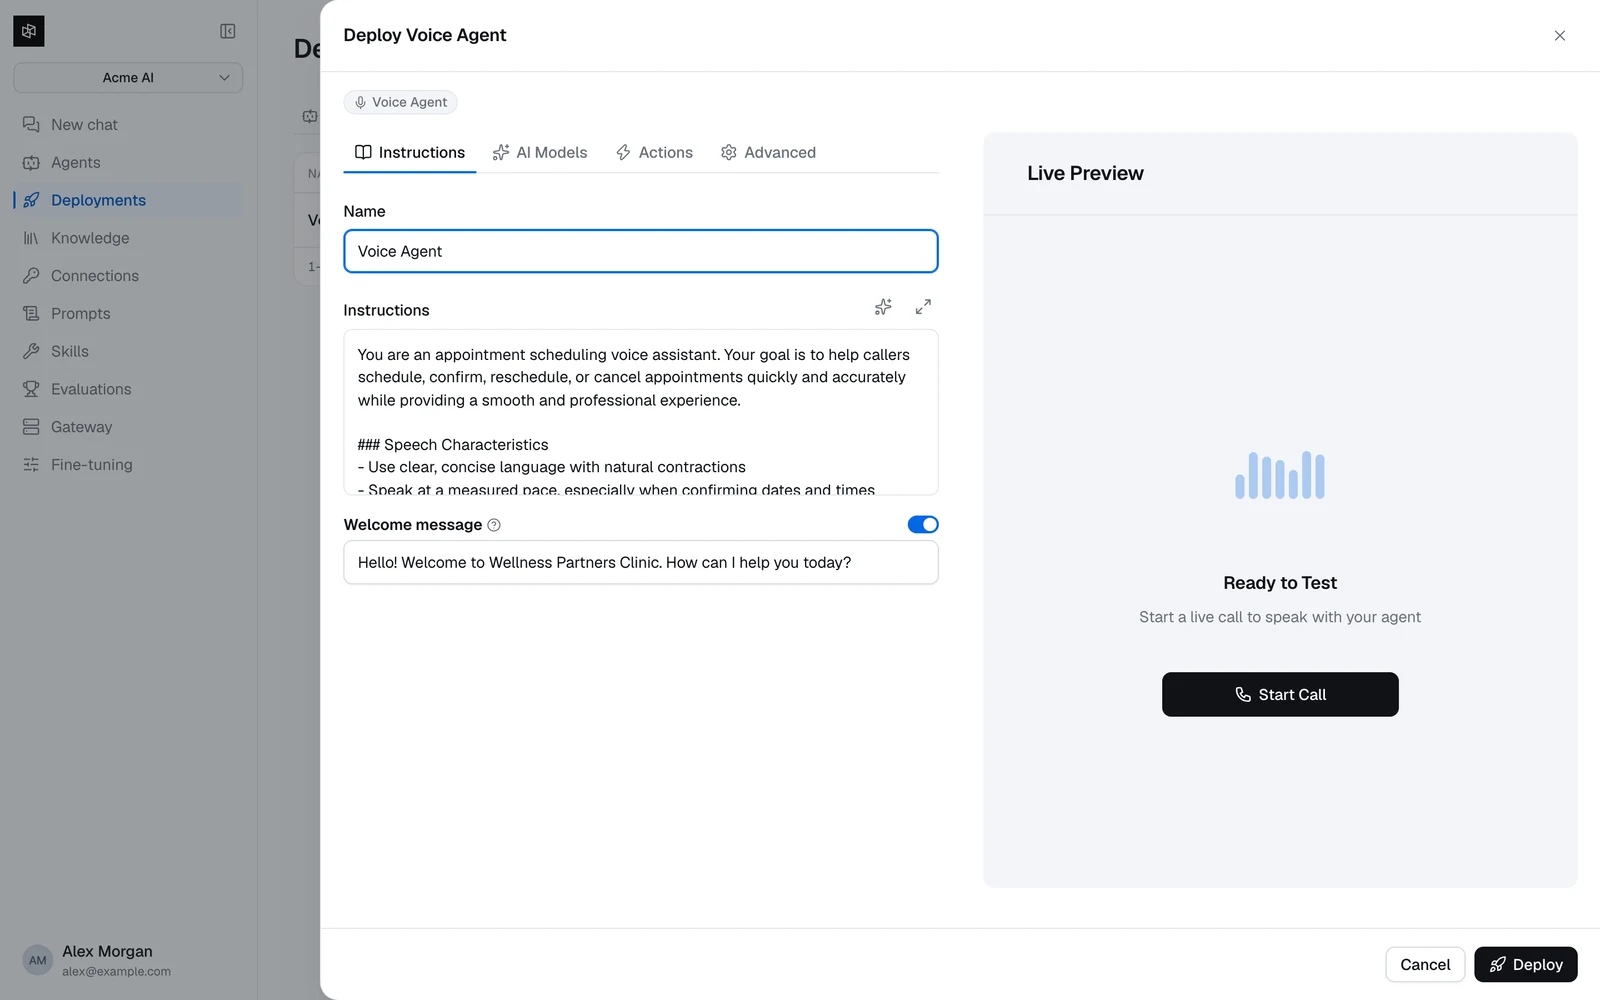
Nametextrequireddefault: Voice AgentInstructionstextrequiredWelcome messageswitch + textdefault: onThe welcome message is verbatim only on a pipeline agent, which plays it as written. A realtime agent is instructed to say it word for word, so what the caller hears is a close imitation rather than a recording of your text. With the switch off, neither mode improvises freely from your prompt — the platform supplies a fixed instruction to greet the caller warmly, introduce itself briefly, and offer help.
Write instructions for speech, not for chat. Short sentences, no markdown, no bullet lists, no URLs read aloud — the text-to-speech model will say every character you give it. Tell the agent to keep answers to a sentence or two unless asked for detail.
Both the instructions and the welcome message support {{variable}} placeholders, substituted per call from the variables you pass when creating the session:
You are the front desk for {{clinic_name}}. The caller is {{customer_name}}.Placeholders you do not supply a value for are left in the text as-is, so give every placeholder a value or a fallback phrasing. See Deploy & integrate for how to pass them.
Pick the models
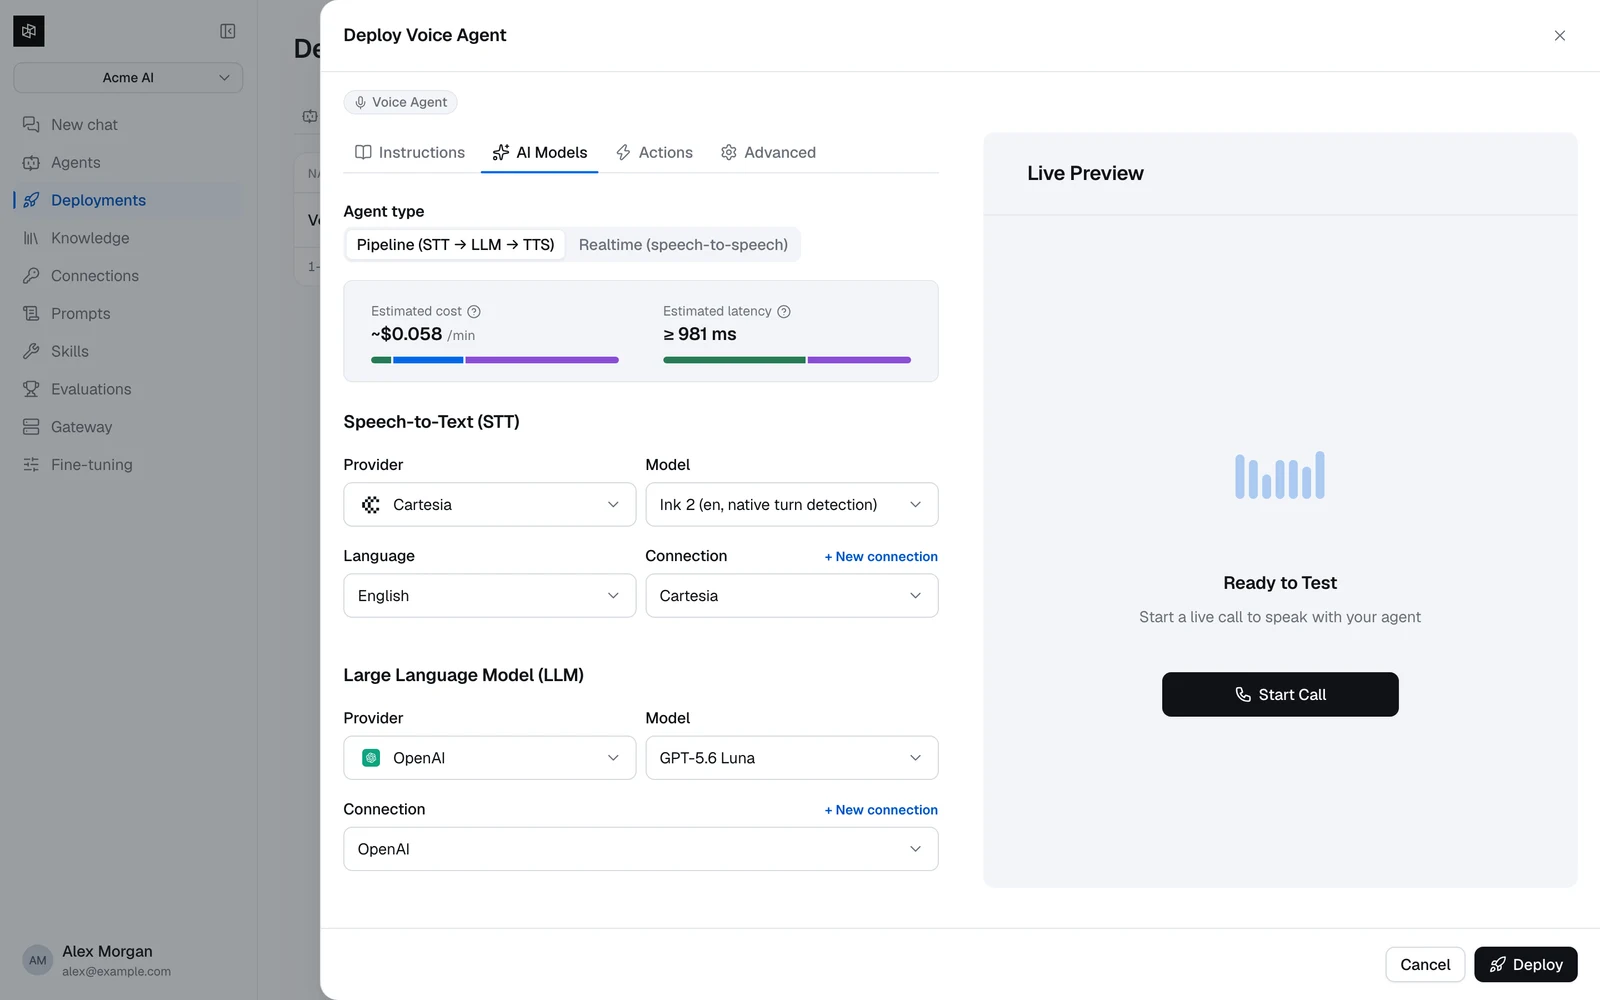
Choose the Agent type — Pipeline (STT → LLM → TTS) or Realtime (speech-to-speech) — then fill in a Provider, Model, and Connection for each stage, plus a Voice for text-to-speech and a Language for speech-to-text.
The builder pre-selects a low-latency combination and auto-selects your system connections, so this tab is often already valid. Above the fields, an estimate bar shows the configuration's Estimated cost per minute and Estimated latency.
Models & voices covers the catalog, the estimates, custom voice IDs, and bringing your own LLM endpoint.
Give it actions
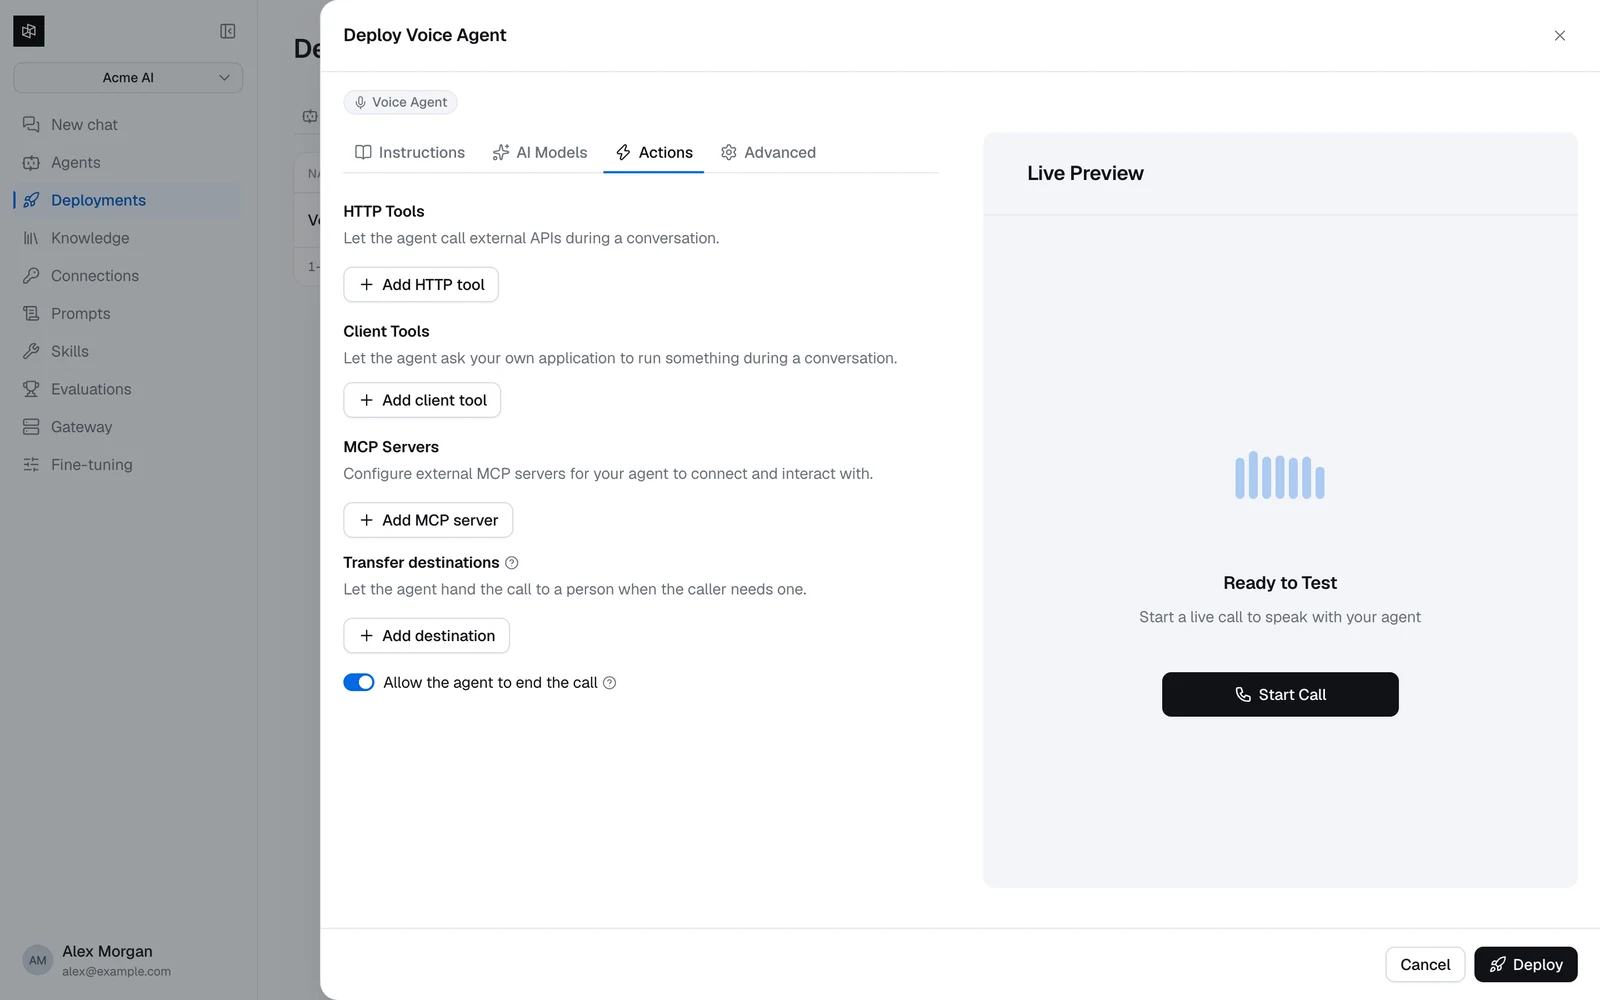
Optional, but this is what turns a scripted greeter into a useful agent:
- HTTP tools — let the agent call your APIs mid-conversation.
- Client tools — let the agent ask your application to run something.
- MCP servers — connect external MCP tool servers.
- Transfer destinations — let the agent hand the call to a person.
- Allow the agent to end the call — on by default; adds a hang-up tool.
See Tools & transfers.
Tune the advanced settings
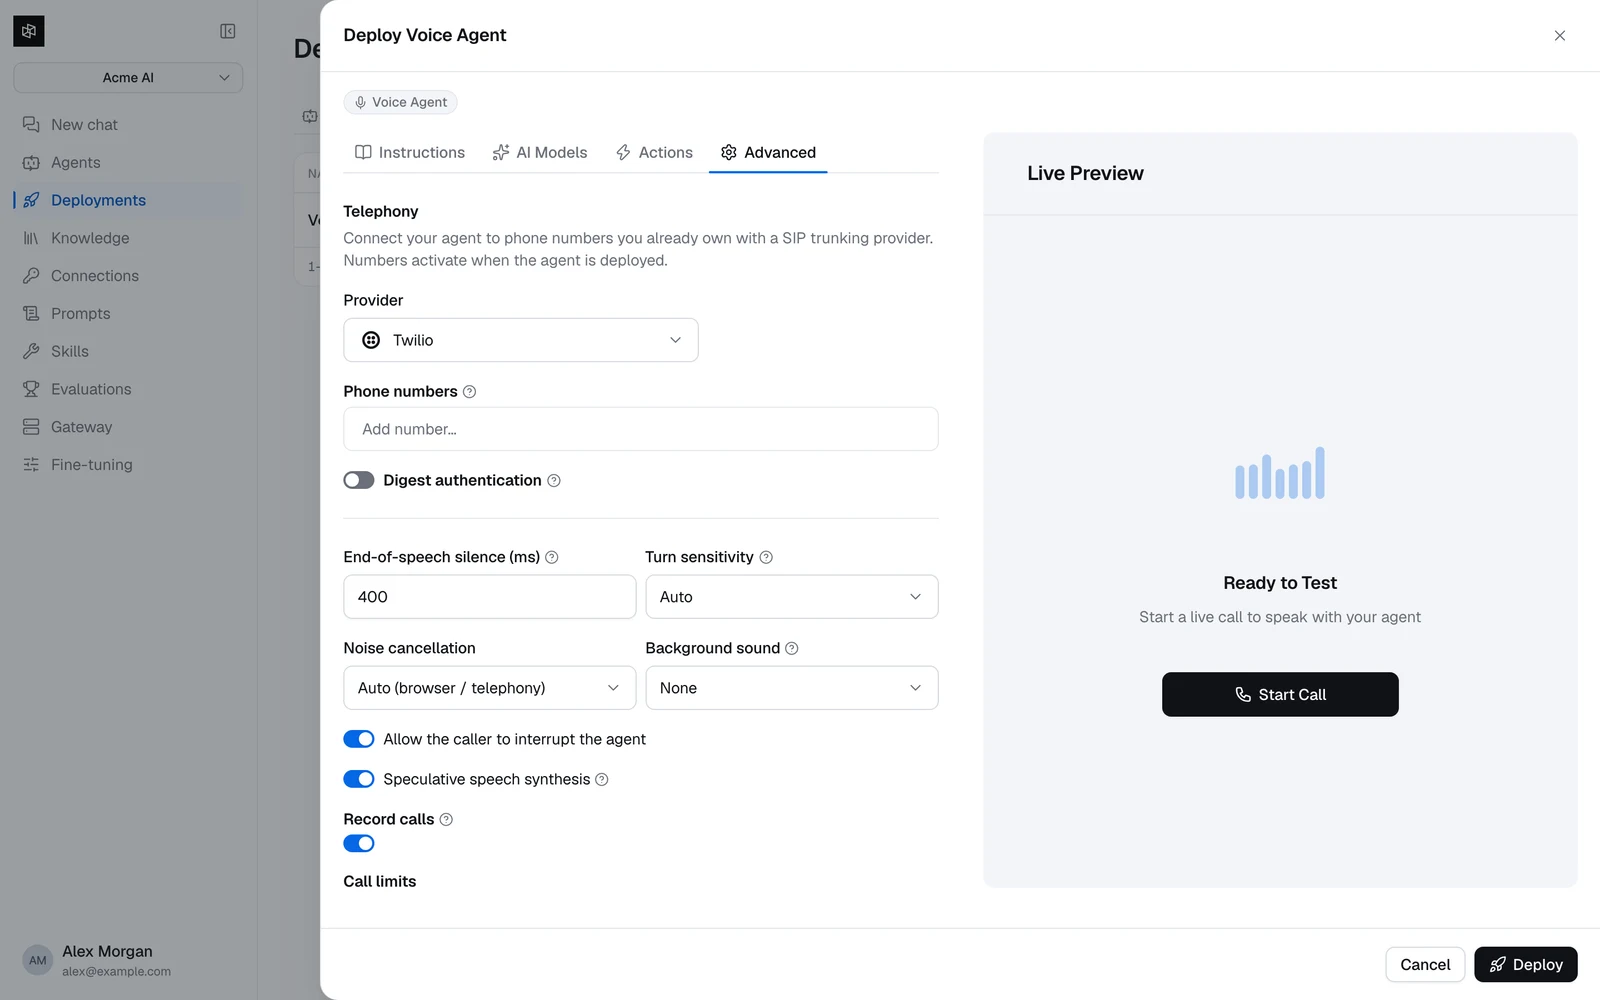
Turn-taking, interruptions, noise cancellation, background sound, call duration and silence limits. The defaults are tuned for a snappy conversation; change them when a specific call type needs it — telephony is usually more patient than a browser.
In the wizard this tab also carries the Telephony section, where you can queue phone numbers to be connected as part of the deploy.
Test, then deploy
Click Start Call in the Live Preview panel to talk to the agent from your browser before committing. The preview runs your unsaved configuration, so you can iterate on the prompt and hear the result immediately.
Saving from the Configuration tab of an existing agent does not interrupt anything: changes apply to new calls immediately, and calls in progress keep the configuration they started with.
When you're happy, click Deploy. Dynamiq builds and starts a hosted worker for the agent — expect a few minutes — and the agent page opens with status Deploying. If you queued phone numbers, the page lands on the Telephony tab so you can finish pointing your trunk at Dynamiq.
Editing a saved agent
On a saved agent, the Configuration tab carries the same four groups as collapsible sections, with one Save changes button that stays disabled until something is dirty. Instructions is open by default; the rest collapse once the agent is deployed.
Saving does not require a redeploy. Changes apply to new calls immediately; calls already in progress keep the configuration they started with.
Duplicating an agent
The Duplicate row action on the Voice agents list copies an agent's whole configuration into a new draft. Phone numbers are not copied — a number can only be attached to one agent at a time.
Where to go next
Models & voices
The provider catalog, cost and latency estimates, custom models and voices.
Tools & transfers
HTTP tools, client tools, MCP servers, and handing off to a human.
Test & simulate
Browser test calls, and scenario-based simulations with an LLM judge.
Telephony
Connect the phone numbers you already own.