Quickstart: Deploy & Call Your Agent
Deploy a workflow as an App, create an Access Key, and call the endpoint over HTTP — synchronous first, then streaming.
This is the core loop of Dynamiq: a workflow on the canvas becomes an App with its own HTTPS endpoint, and anything that can make an HTTP request can use your agent. In this quickstart you deploy the workflow from Quickstart: Build an Agent, create an Access Key, and call the endpoint with curl, Python, and TypeScript — synchronously, then with streaming.
You need a saved workflow before you can deploy — every save creates a version, and a deployment pins to one. If you skipped the previous quickstart, any saved workflow works; just swap in your own Input node field names below.
Deploy the workflow as an App
Open the deploy modal
Open your saved workflow and click Deploy in the toolbar. (You can also deploy from the Deployments page in the sidebar.) The modal has two modes: New deployment creates a new App from this workflow; Existing deployment redeploys the workflow to an App that already exists.

Configure and create
Choose New deployment and fill in:
- Name — the App's name (prefilled from the workflow name).
- Description — optional.
- Runtime — the runtime that executes the workflow; the default is right unless you have a dedicated runtime.
Click Create. Dynamiq pins the deployment to the workflow version you selected and starts rolling it out.
Watch it go live
You land on the app page under Deployments. The tabs across the top are MONITORING, HISTORY, TRACES, SESSIONS, INTEGRATION, TRIGGERS, and TEST. The HISTORY tab shows the deployment progressing; once it succeeds, the app's endpoint hostname is shown on the page.
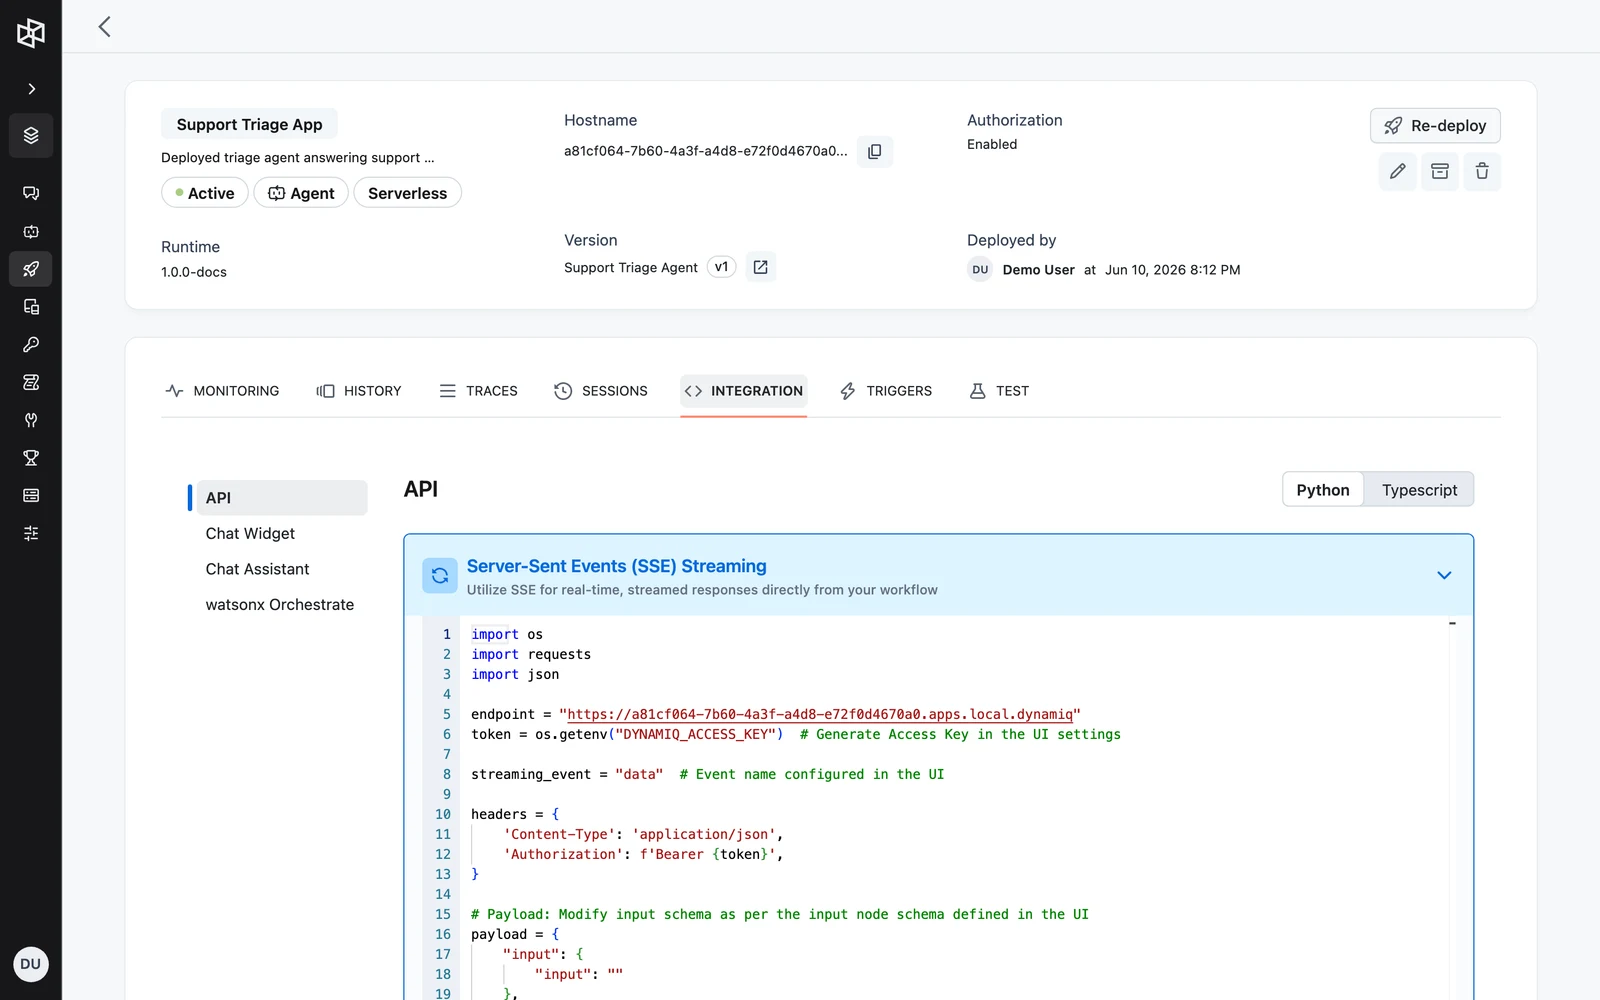
Copy the hostname — every example below uses it as https://<your-app-hostname>. The INTEGRATION → API tab shows the same snippets prefilled with your real hostname and input fields.
Create an Access Key
Deployed apps are called with an Access Key — an organization credential for invoking deployed apps, inferences, and services. It is different from a Personal Access Token, which acts as you against the management API (see Core Concepts).
Open Access Keys in Settings
Go to your organization Settings and open the Access Keys tab.
Create the key
Click Add new access key and fill in:
- Name — something descriptive like
prod-backend. - Project — scope the key to one project, or choose Organization-wide (all projects). A project-scoped key can only call apps deployed in that project, so pick the project your App lives in.
- Expires at — optional expiry; leave empty for a non-expiring key.
Click Create.
Copy it now
The key value — it starts with dynamiq_acc_ — is shown once, on creation; only a hash is stored, so it cannot be retrieved later. Copy it and store it as an environment variable:
export DYNAMIQ_ACCESS_KEY="<paste-your-key>"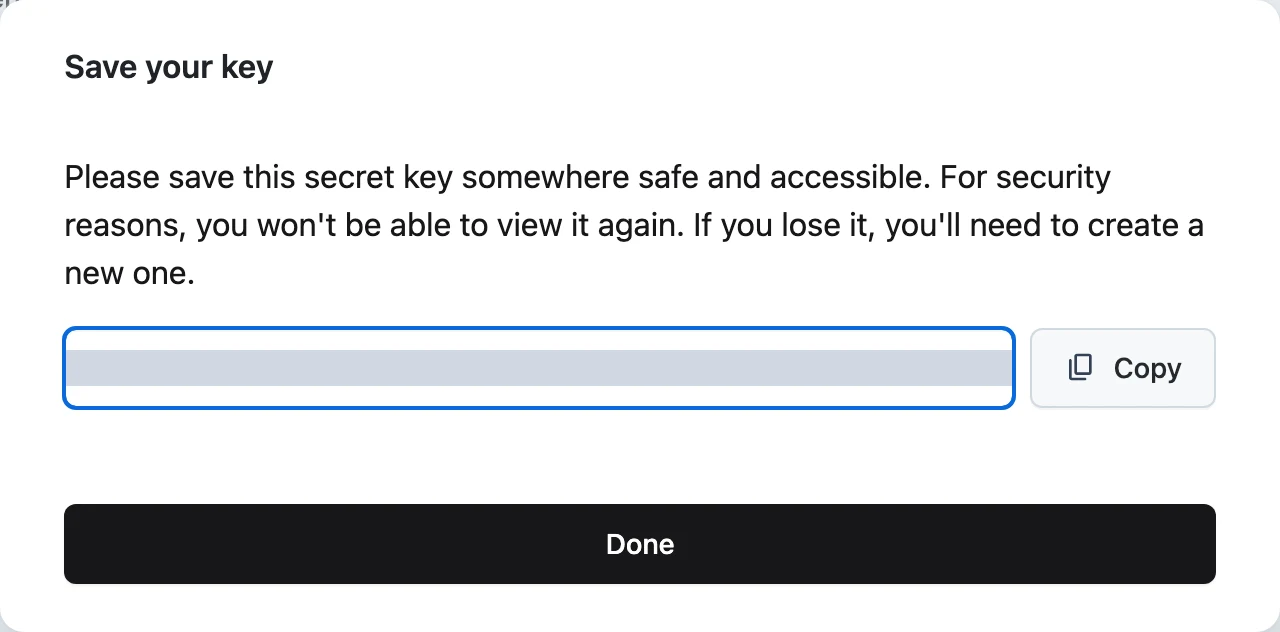
Call the app — synchronous
If you want to see the app respond before writing any code, open the TEST tab on the app page — it sends the same request from the browser.
To call it from your own code, send a POST to the app's hostname with a JSON body. The input object must match the schema of your workflow's Input node — the agent workflow from the previous quickstart takes a single input field. "stream": false makes the call synchronous: the response arrives as one JSON document when the run finishes.
curl -X POST "https://<your-app-hostname>" \
  -H "Content-Type: application/json" \
  -H "Authorization: Bearer $DYNAMIQ_ACCESS_KEY" \
  -d '{
    "input": {
      "input": "What did the most recent EU AI Act guidance change for general-purpose models?"
    },
    "stream": false
  }'
import os
import requests
import json
endpoint = "https://<your-app-hostname>"
token = os.getenv("DYNAMIQ_ACCESS_KEY")
headers = {
"Content-Type": "application/json",
"Authorization": f"Bearer {token}",
}
# Payload: the keys inside "input" must match your workflow's Input node schema.
payload = {
"input": {
"input": "What did the most recent EU AI Act guidance change for general-purpose models?"
},
"stream": False,
}
response = requests.post(endpoint, json=payload, headers=headers)
if response.status_code == 200:
data = response.json()
print("Response:", json.dumps(data, indent=4))
else:
print(f"Failed: {response.status_code} {response.text}")const endpoint = "https://<your-app-hostname>";
const token = process.env.DYNAMIQ_ACCESS_KEY;
const headers = {
"Content-Type": "application/json",
Authorization: `Bearer ${token}`,
};
// Payload: the keys inside "input" must match your workflow's Input node schema.
const payload = {
input: {
input:
"What did the most recent EU AI Act guidance change for general-purpose models?",
},
stream: false,
};
async function callApp() {
const response = await fetch(endpoint, {
method: "POST",
headers,
body: JSON.stringify(payload),
});
if (!response.ok) {
throw new Error(
`Failed to connect to ${endpoint}. Status code: ${response.status}. Response: ${await response.text()}`,
);
}
const data = await response.json();
console.log("Response:", JSON.stringify(data, null, 4));
}
callApp();The response body contains your workflow's output — for the research agent, the Output node's answer.
Call the app — streaming
Set "stream": true and the answer arrives in small pieces as the agent writes it, instead of one document at the end. The app responds with Server-Sent Events (SSE): each line starts with data: and carries a JSON message. The pieces of the answer (token deltas) arrive on the streaming event configured in the UI (default data) at data.choices[0].delta.content — the same shape as OpenAI-style chat deltas.
Token deltas are emitted only if Streaming is enabled on the Agent node. Select the agent on the canvas, turn on Streaming in the configuration panel (the Event field defaults to data), then save and redeploy. With streaming off, "stream": true still returns SSE but without token-by-token content.
curl -N -X POST "https://<your-app-hostname>" \
  -H "Content-Type: application/json" \
  -H "Authorization: Bearer $DYNAMIQ_ACCESS_KEY" \
  -d '{
    "input": {
      "input": "What did the most recent EU AI Act guidance change for general-purpose models?"
    },
    "stream": true
  }'
-N disables curl's buffering so events print as they arrive.
import os
import requests
import json

endpoint = "https://<your-app-hostname>"
token = os.getenv("DYNAMIQ_ACCESS_KEY")

streaming_event = "data"  # Event name configured in the UI

headers = {
    "Content-Type": "application/json",
    "Authorization": f"Bearer {token}",
}

payload = {
    "input": {
        "input": "What did the most recent EU AI Act guidance change for general-purpose models?"
    },
    "stream": True,
}

response = requests.post(endpoint, json=payload, headers=headers, stream=True)

if response.status_code == 200:
    # Consume server-sent events (SSE)
    for line in response.iter_lines(decode_unicode=True):
        if line.startswith("data:"):
            data = line[len("data:"):].strip()
            try:
                json_data = json.loads(data)
                if json_data.get("event") == streaming_event:
                    content = (
                        json_data.get("data", {})
                        .get("choices", [{}])[0]
                        .get("delta", {})
                        .get("content")
                    )
                    if content:
                        print(content, end="")
            except json.JSONDecodeError as e:
                print(f"Invalid JSON format: {data} - Error: {e}")
else:
    print(f"Failed: {response.status_code} {response.text}")
const endpoint = "https://<your-app-hostname>";
const token = process.env.DYNAMIQ_ACCESS_KEY;
const streamingEvent = "data"; // Event name configured in the UI
const payload = {
input: {
input:
"What did the most recent EU AI Act guidance change for general-purpose models?",
},
stream: true,
};
async function streamApp() {
const response = await fetch(endpoint, {
method: "POST",
headers: {
"Content-Type": "application/json",
Authorization: `Bearer ${token}`,
},
body: JSON.stringify(payload),
});
if (!response.ok || !response.body) {
throw new Error(`Failed: ${response.status} ${await response.text()}`);
}
const reader = response.body.getReader();
const decoder = new TextDecoder();
let buffer = "";
while (true) {
const { done, value } = await reader.read();
if (done) break;
buffer += decoder.decode(value, { stream: true });
const lines = buffer.split("\n");
buffer = lines.pop() || ""; // keep the last incomplete line
for (const line of lines) {
if (!line.startsWith("data:")) continue;
try {
const jsonData = JSON.parse(line.substring(5).trim());
if (jsonData.event === streamingEvent) {
const content = jsonData.data?.choices?.[0]?.delta?.content;
if (content) process.stdout.write(content);
}
} catch {
// ignore partial frames
}
}
}
}
streamApp();Apps also support WebSocket connections (bi-directional, human-in-the-loop feedback) and async callbacks ("execution_mode": "async" with a callbacks array — Dynamiq POSTs the result to your webhook when the run finishes). See Streaming & Async.
Verify the run
Open the app page and check the TRACES tab — every call you just made is there as a run, with the full execution tree: agent loops, tool calls, LLM requests, latencies, and token usage. The TEST tab lets you invoke the app from the browser without writing any client code. See Monitoring, History & Traces.