Quickstart: Build an Agent
Create a workflow, add an Agent node with a web search tool, configure its LLM, and run a test — all on the canvas.
In this quickstart you build a research agent that answers questions using live web search. You will create a workflow, drop in an Agent node, give it a web search tool and an LLM, write its instructions, and test it — all without leaving the editor. It takes about ten minutes.
Before you start
You need a Connection for the LLM provider you want to use (for example OpenAI or Anthropic), and one for the web search tool (Tavily in this guide). If you don't have them yet, create both in Connections first — see Create a Connection. Some workspaces come with system connections preconfigured, in which case you can skip this.
Build the agent
Create a workflow
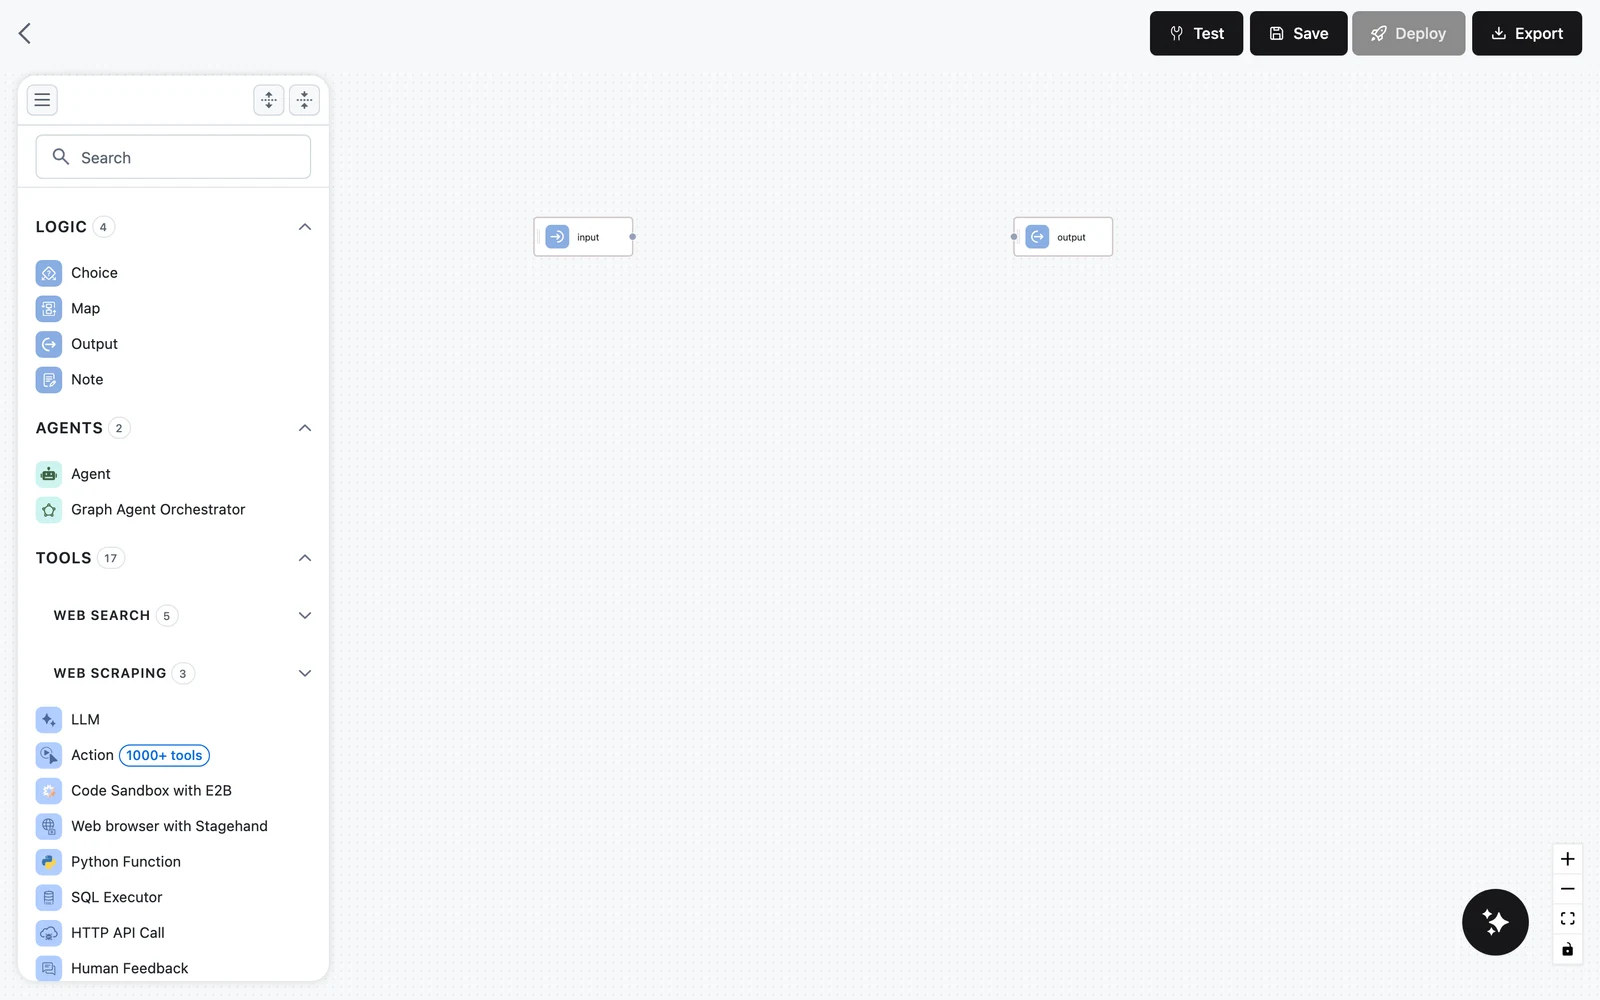
Click Agents in the sidebar, then Add new agent. A template picker opens — choose Create workflow from scratch. You land on the canvas: a node palette on the left, the canvas in the middle, and a configuration panel on the right when a node is selected. The toolbar at the top has Test, Save, Deploy, and Export buttons.
Add an Agent node
In the left palette, open the AGENTS category (or type "Agent" in the Search field) and add Agent to the canvas. This is the agent node: it reasons in a loop, decides which of its tools to call, and stops when it has an answer.
A new workflow already has Input and Output nodes on the canvas. Connect the Input node's output to the Agent's input, and the Agent's output to the Output node, so the workflow input flows through the agent.
Configure the LLM
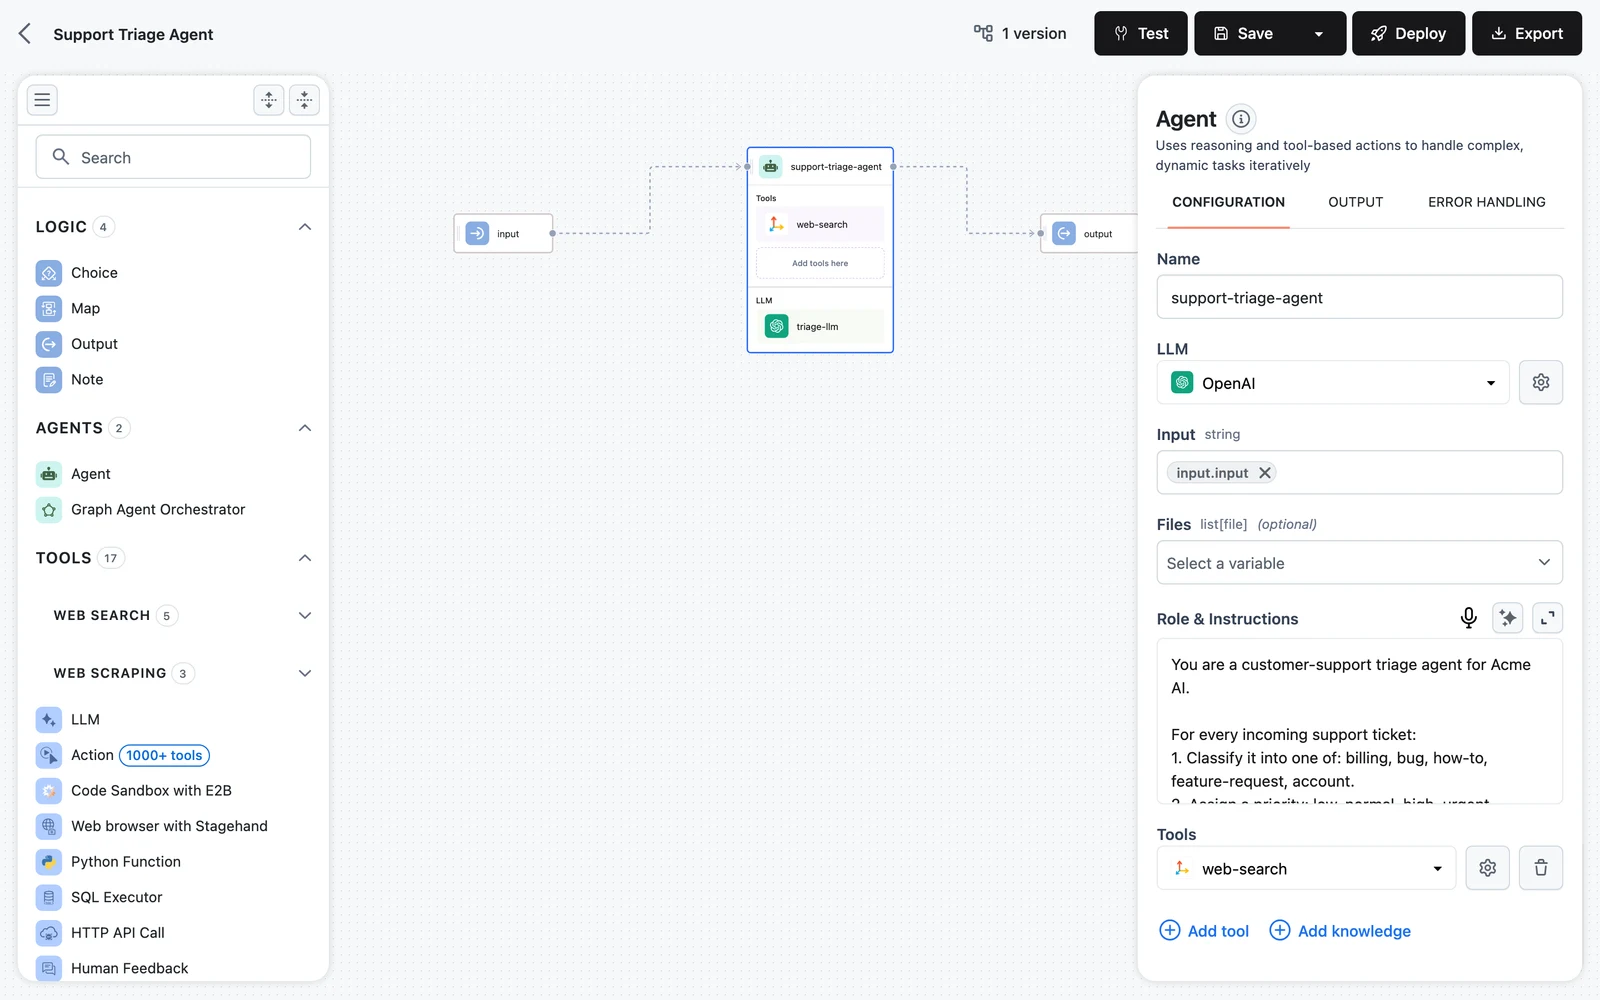
Select the Agent node. In the configuration panel on the right, the LLM section is where you pick the model that powers the agent:
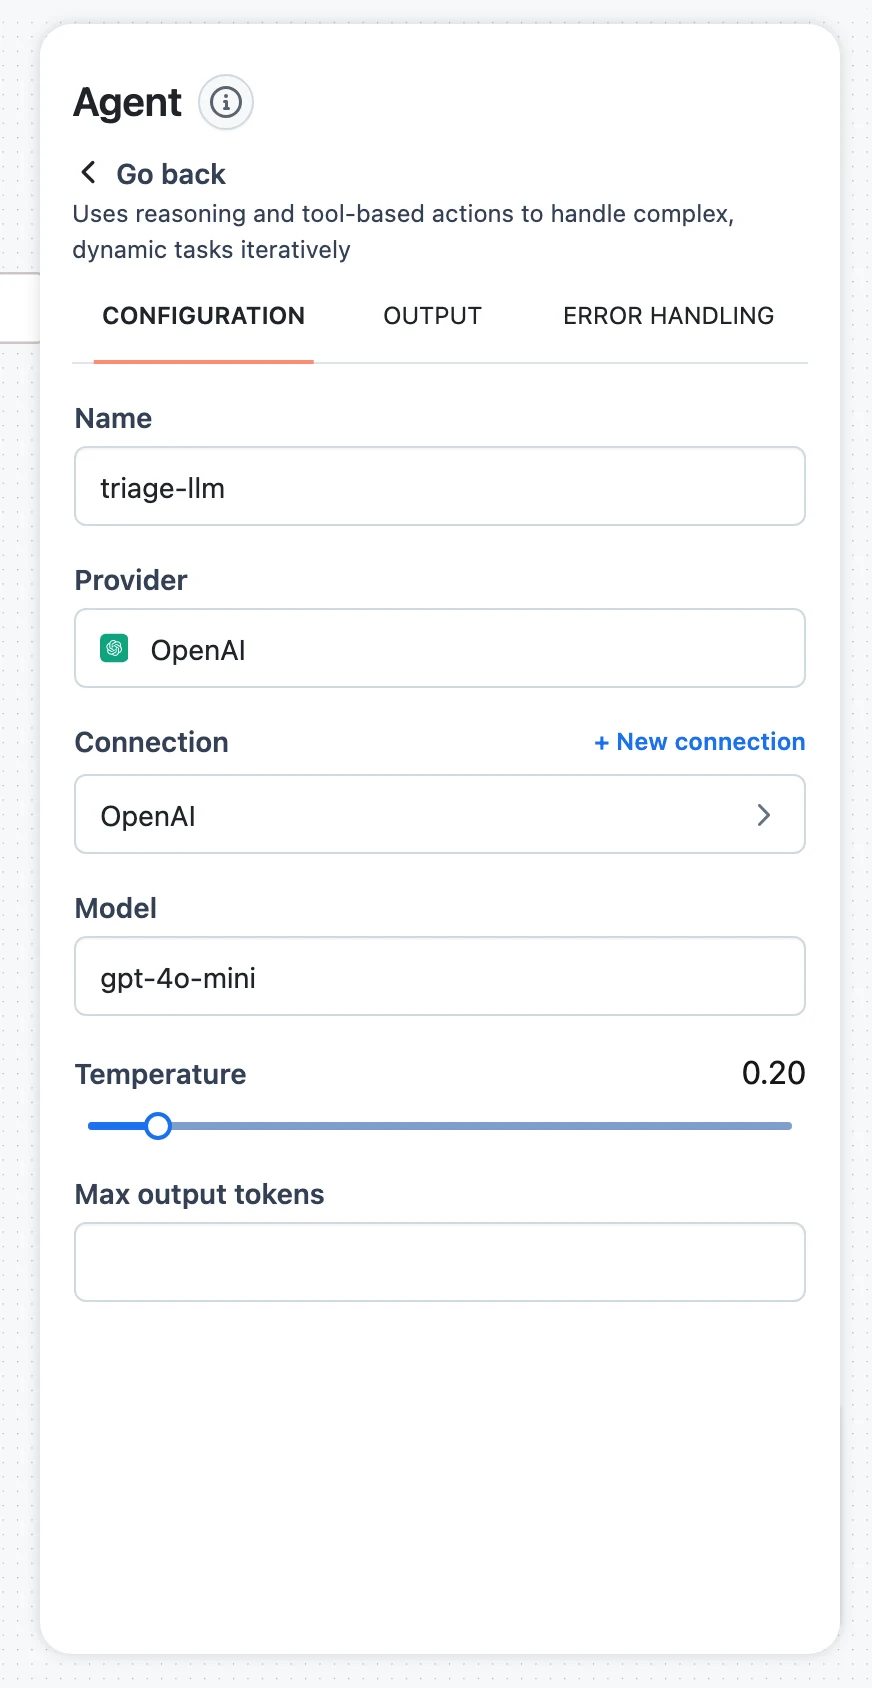
- Choose a provider (OpenAI, Anthropic, Gemini, and many others are supported).
- Click the gear icon next to it to open the LLM's configuration.
- Select the Connection that holds your provider credentials, pick a model, and optionally adjust Temperature and Max output tokens.
Write the agent's instructions
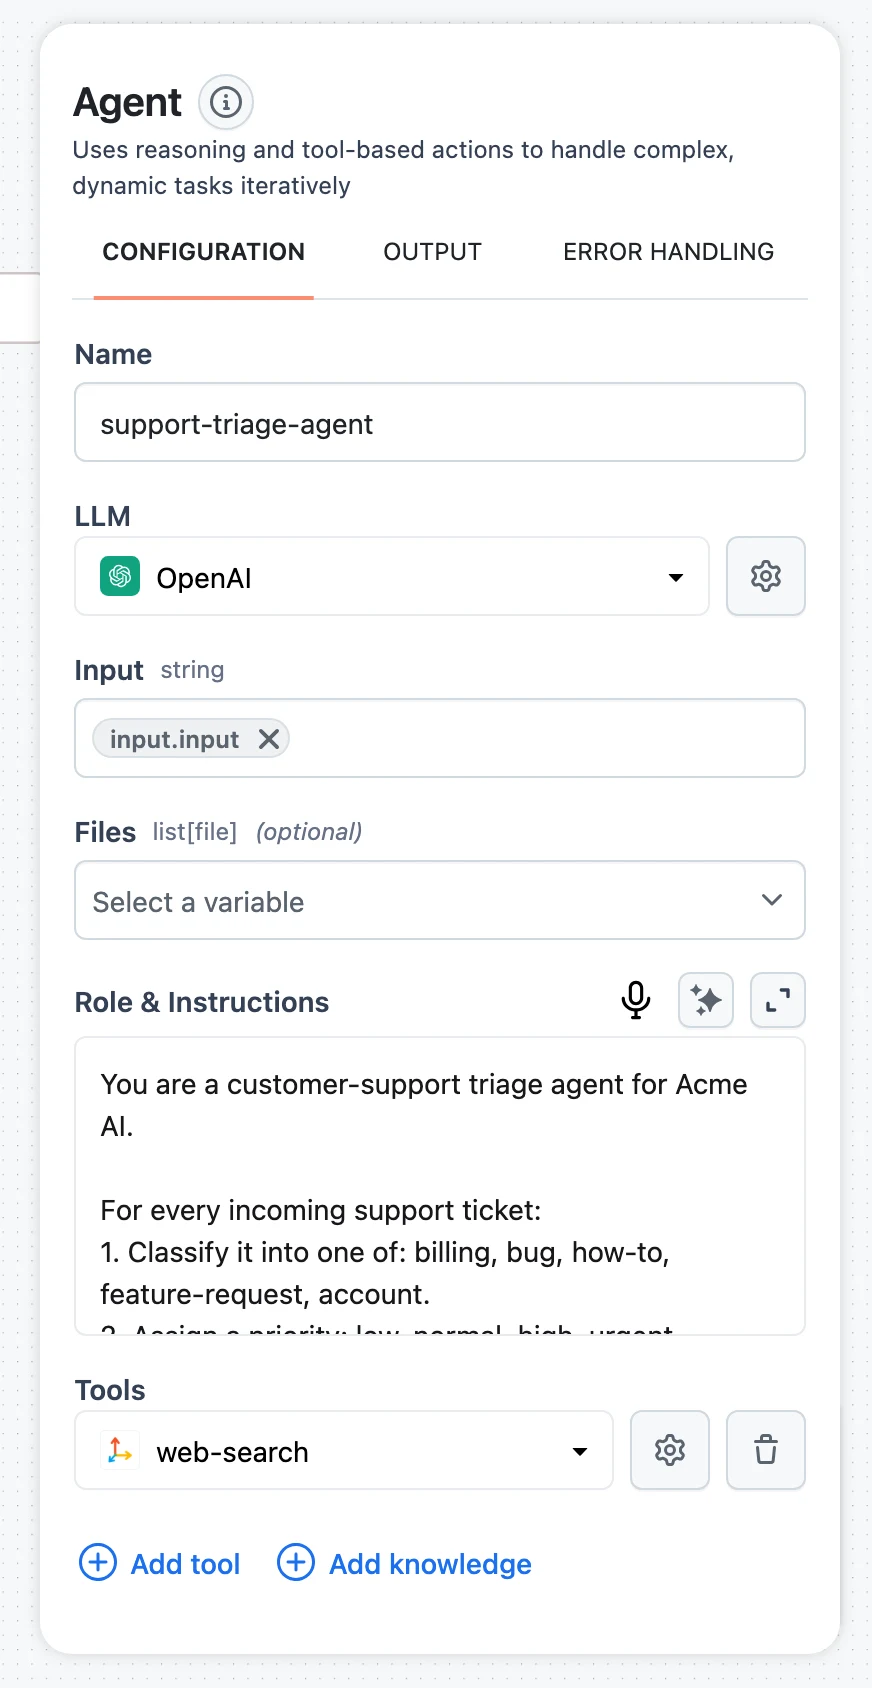
Still in the configuration panel, fill in Role & Instructions. This is the agent's system-level identity and operating rules:
You are a research assistant. For every question:
1. Search the web for current, authoritative sources.
2. Cross-check at least two sources before stating a fact.
3. Answer concisely and cite source URLs at the end.
See Agent Prompts & Roles for patterns that work well.
Add a web search tool
In the Tools section of the Agent panel, click Add tool and pick Tavily from the list. Click the gear icon next to the tool to open its configuration, select your Tavily Connection, and optionally tune Max results and Search depth.
The tool now appears in the agent's tool list — at run time the agent decides when to call it. You can add as many tools as you need; see Agent Tools for the catalog.
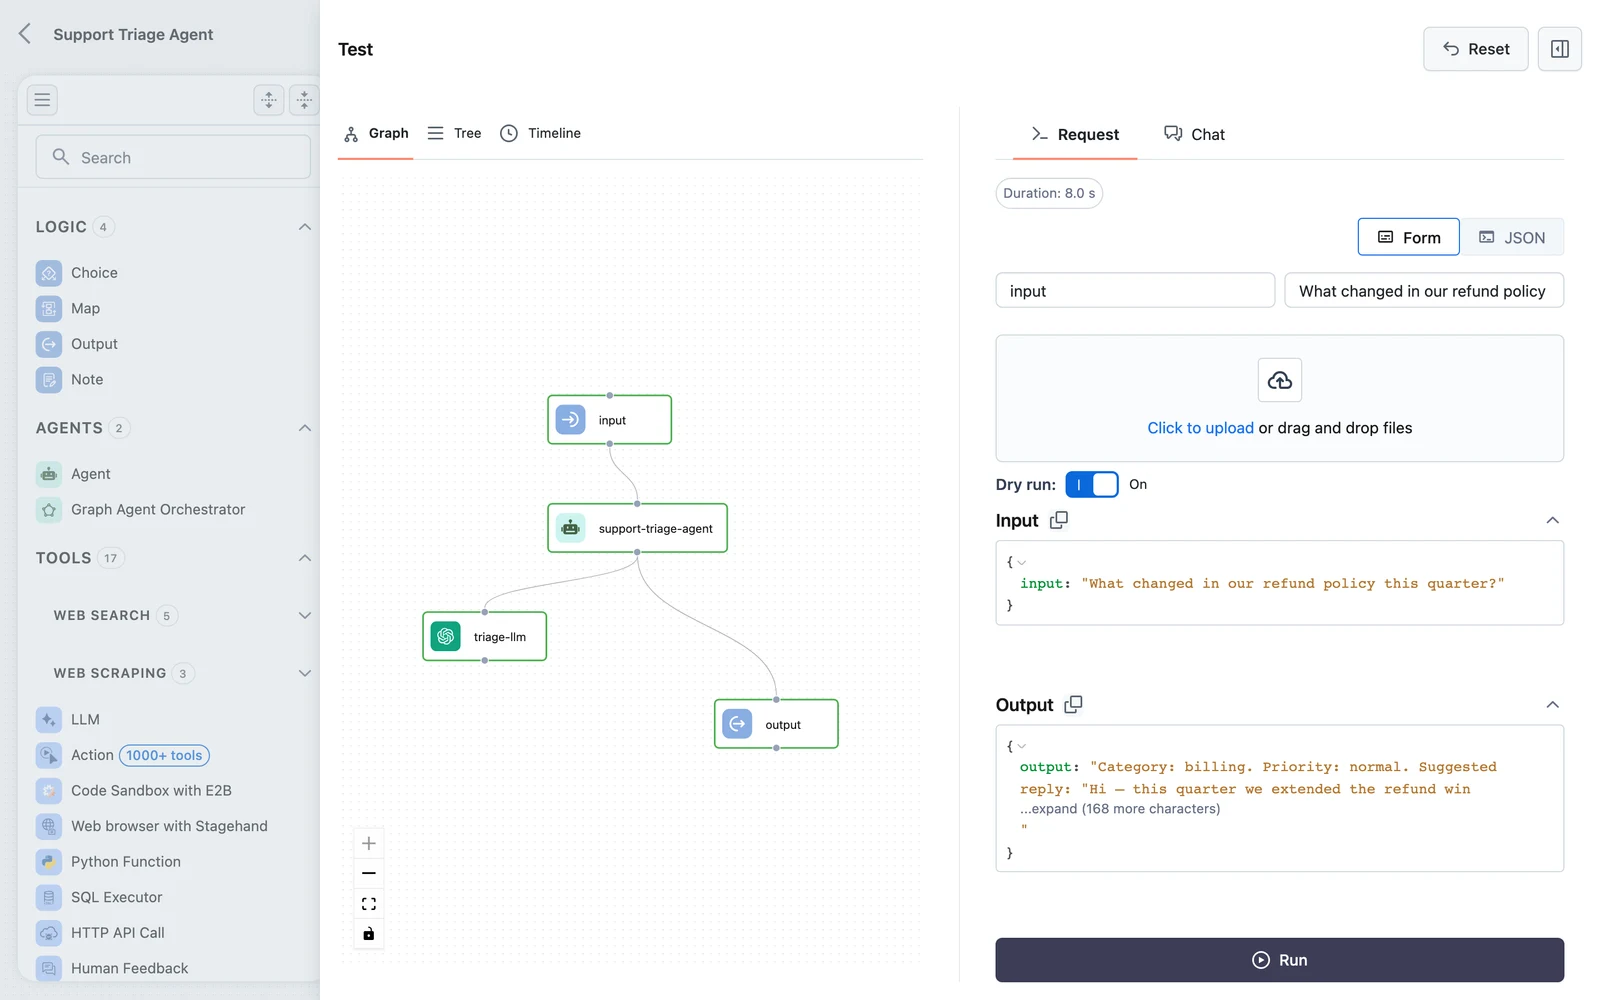
Test it
Click Test in the toolbar. Enter a question in the input field, for example:
What did the most recent EU AI Act guidance change for general-purpose models?Run it and inspect the execution: the trace shows each node's result, and you can dig into the agent's reasoning loop — searches it issued, results it read, and the final answer.
Save
Click Save and give the workflow a name like research-agent. Each save creates a version you can later pin a deployment to or roll back to — see Versions & Releases.
If a node uses requirements (placeholders resolved at deploy time), the Test button is disabled — deploy the workflow to test it with requirements filled in.
What you built
Your workflow is a three-node DAG: Input → Agent → Output, where the Agent node owns an LLM and a Tavily web search tool. Inputs arrive as JSON matching the Input node's schema, and the Output node returns the agent's answer. The same pattern scales to agents with memory, knowledge bases, multiple tools, and multi-agent orchestration.