Overview
What a Dynamiq workflow is — the Input → nodes → Output anatomy, drafts vs. releases, and everywhere workflows run on the platform.
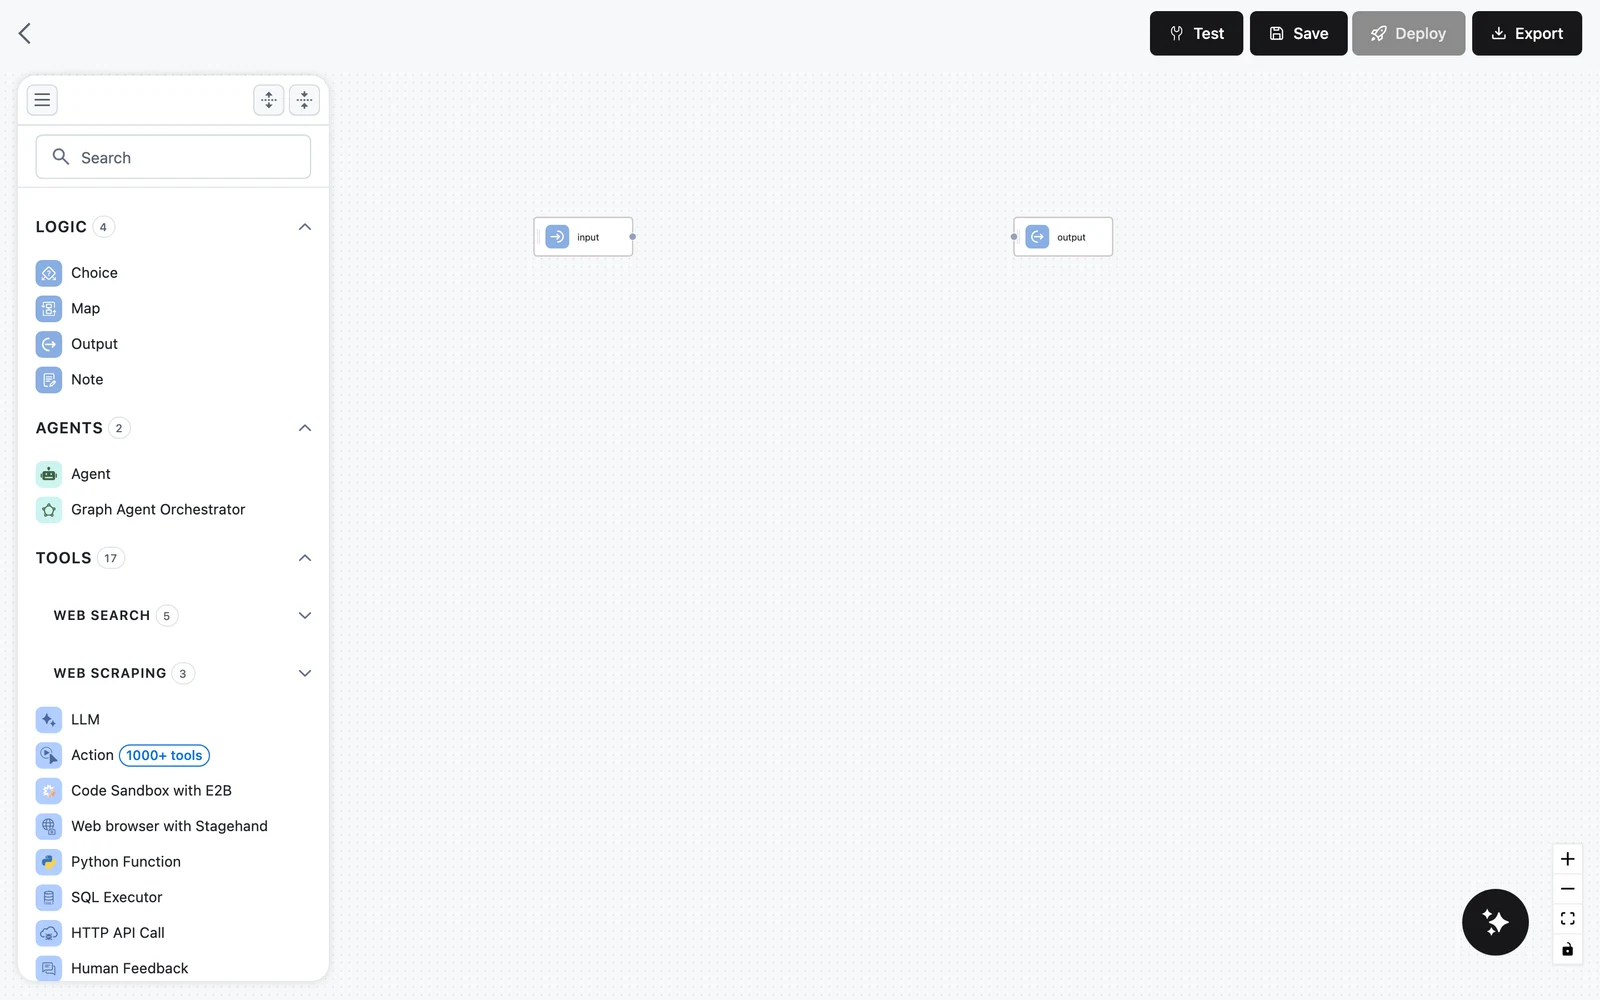
A Workflow is the buildable DAG at the heart of Dynamiq: a graph of nodes that takes a request in through an Input node, processes it through agents, LLMs, tools, and transformers, and returns a response through an Output node. You build workflows visually in the editor, test them in place, save them as versions, and deploy them as Apps.
Anatomy of a workflow
Every new workflow starts with exactly two nodes already on the canvas — Input and Output — and neither can be deleted. Everything you add goes between them.
The Input node
The Input node defines the request schema: the named fields a caller (or a test run) must provide. A fresh workflow starts with two fields:
input— type Any, the main payload.files— type Files, for file uploads.
You can rename, retype, add, and remove fields. Every field you define here becomes a variable that downstream nodes can map into their inputs.
Processing nodes
Between Input and Output you add nodes from the palette: the Agent node, LLMs, web search and scraping tools, validators, transformers, RAG nodes (converters, splitters, embedders, retrievers, writers), and logic operators like Choice and Map. Each node declares typed inputs and outputs; see How nodes connect for the rules.
The Output node
The Output node defines the response schema. A fresh workflow has:
output— type Any, marked Required.files— for returning files.
Each Output field is mapped: you pick which upstream node's output fills it (for example, an Agent's content). An unmapped field is the most common reason a workflow returns nothing — the Output node does not receive data just because an edge points at it.
Edges and data flow
Edges define execution order and dependencies: a node runs after the nodes it depends on, and only nodes that are upstream of a node appear in its variable picker. Data itself moves through explicit mappings — each input field of a node selects an upstream output with a JSONPath selector like $.agent.output.content. The Input transformers page covers selectors in depth.
Drafts, saves, and releases
Workflows are versioned:
- Draft — a workflow that has never been released. The workflows list shows a Draft label instead of a version count. Saving a draft releases it as its first version. If you navigate away from an unsaved draft, the editor warns you: "You have unsaved changes. Leaving will delete this draft. Are you sure?"
- Save — every save in the editor creates a new version. The save panel shows the version it is about to create (for example
v3when the workflow has 2 versions) along with a version description field; new workflows and drafts also get a name field. - Save as new — the menu next to Save copies the current canvas into a brand-new workflow starting at
v1. - Release / Version — a saved, immutable snapshot. Apps pin to a specific version, so editing a workflow never changes what a deployed App runs until you re-deploy.
The versions button in the editor header opens the version history, where you can preview earlier versions. See Versions and releases.
The editor blocks navigation when the canvas differs from the last saved state, so you cannot silently lose work — but only Save actually persists a version.
The editor toolbar
The header of the workflow editor has these controls:
- Test — runs the current canvas (unsaved changes included) in a side panel with a Request form and a Chat tab, then shows the execution trace. Testing is disabled while nodes use unresolved requirements ("Testing is not available when workflow nodes use requirements").
- Save — validates the workflow and opens the save panel. The arrow next to it offers Save as new.
- Deploy — opens the deployment panel. Disabled until the workflow is saved ("Save workflow to be able to deploy it").
- Export — exports the workflow definition.
- The versions button — toggles the version history list.

Where workflows run
| Surface | What it does |
|---|---|
| Apps | Deploy a saved version as a hosted endpoint with its own hostname, run history, and traces. See Deploy a Workflow App. |
| Test runs | The Test panel executes the canvas directly from the editor — no deployment needed. See Testing and debugging. |
| Knowledge Base ingestion | Each Knowledge Base owns an ingestion workflow built in the same editor, organized into fixed Pre-processing, Chunking, Vectorization, and Storage groups. See Customize the ingestion workflow. |
| Agent builder | A focused variant of the editor for building a single agent; the palette hides RAG-indexing categories that only make sense in full workflows. |
Starting points
When you create a workflow you do not have to start from a blank canvas:
- Templates — the create screen opens a template gallery (RAG pipelines, research agents, document extractors, and more). See Templates.
- Generate from prompt — describe the workflow in natural language and the generator drafts the nodes and edges for you, which you then refine on the canvas.
- Blank canvas — close the gallery and build from the Input and Output nodes up.