Build Your First Workflow
A hands-on tutorial: wire Input → Agent → Output, map the data between them, test-run it, inspect the trace, and release v1.
This tutorial builds the smallest useful workflow — an Agent sitting between the Input and Output nodes — and takes it all the way from blank canvas to released version. Along the way you do the three things every workflow needs: connect nodes, map data into them, and map data out to the Output node.
Before you start
- You need a Connection for the LLM provider your agent will use (or use a system-provided connection if your org has one).
- No deployment is required to follow along — the Test panel runs the canvas directly.
Build the workflow
Create a new workflow
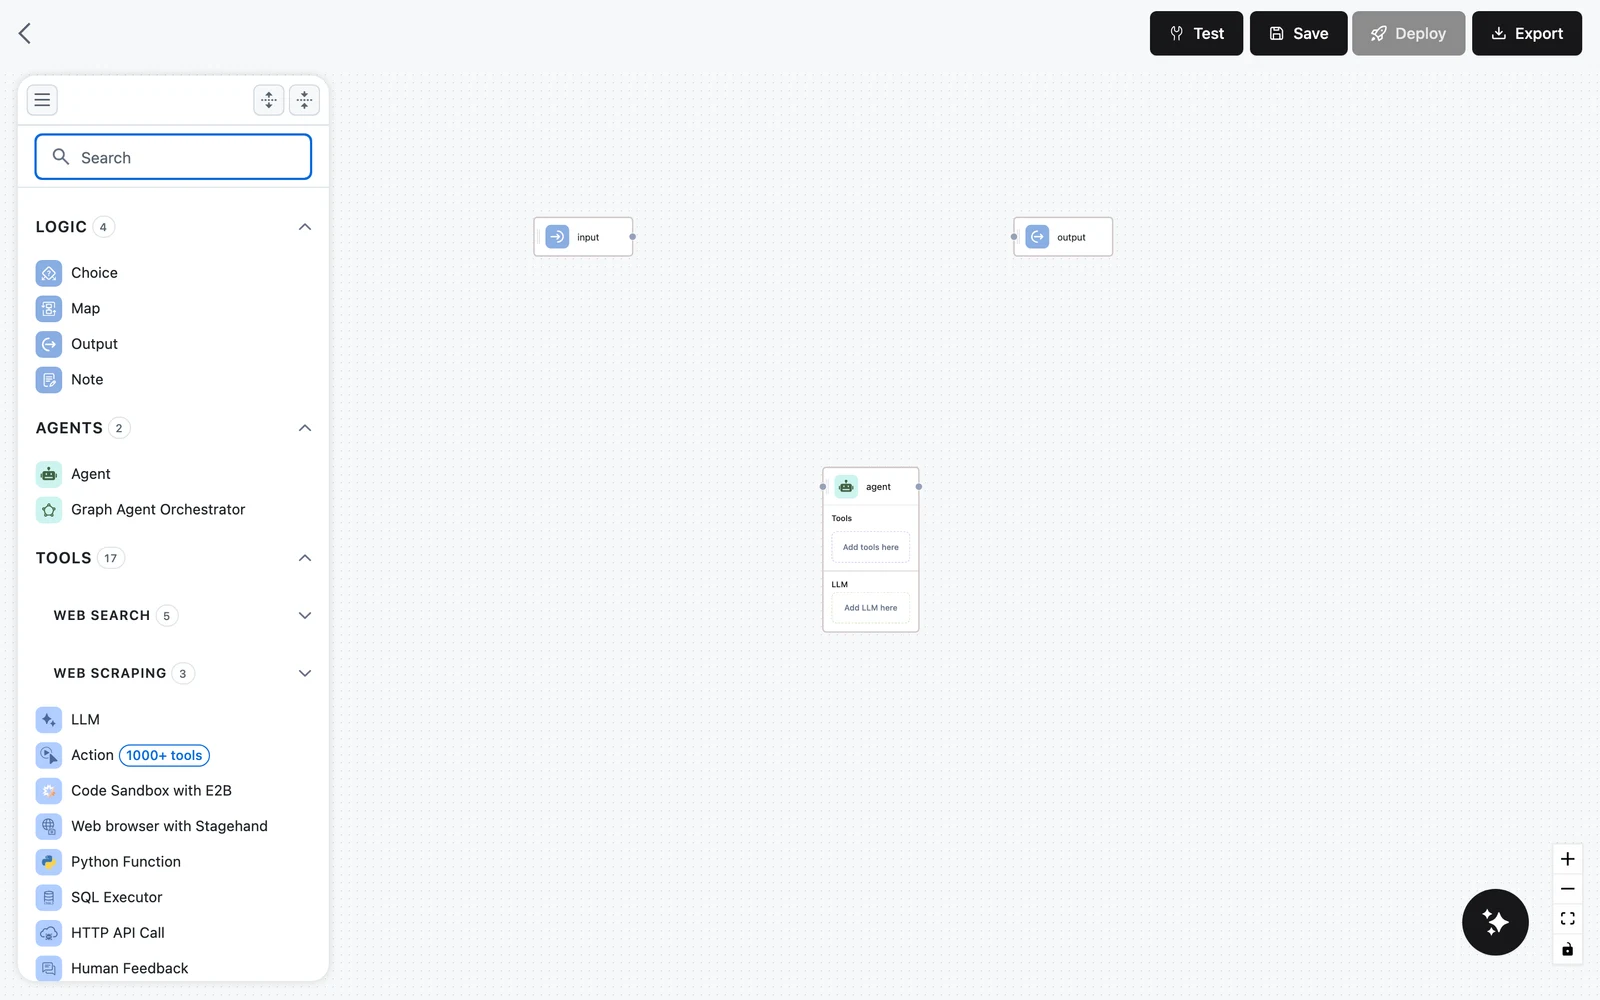
Go to Workflows in your project and create a new workflow. A template gallery opens first — you can pick a template or generate a workflow from a prompt later; for this tutorial, close the gallery to start from a blank canvas.
The canvas is not empty: every workflow starts with an Input node and an Output node. Neither can be deleted.

Add an Agent node
In the left palette, expand the AGENTS category and drag Agent onto the canvas between Input and Output.
The Agent node is a container: its card shows a Tools section with an "Add tools here" placeholder and an LLM section with an "Add LLM here" placeholder.
Give the agent an LLM
Drag the LLM node (in the TOOLS category of the palette) and drop it onto the agent's Add LLM here placeholder. Only LLM nodes are accepted here — dropping anything else shows "Only LLMs are allowed to be added here".
Click the LLM inside the agent to open its configuration on the right: pick the Provider (for example OpenAI or Anthropic), the Connection, and the model. The LLM lives inside the agent — it is not a separate node on the canvas and needs no edges.

The same pattern applies to tools: drop a search or scraping tool onto Add tools here to let the agent call it. Tools inside an agent are invoked by the agent's reasoning loop, not by edges. See Agent tools.
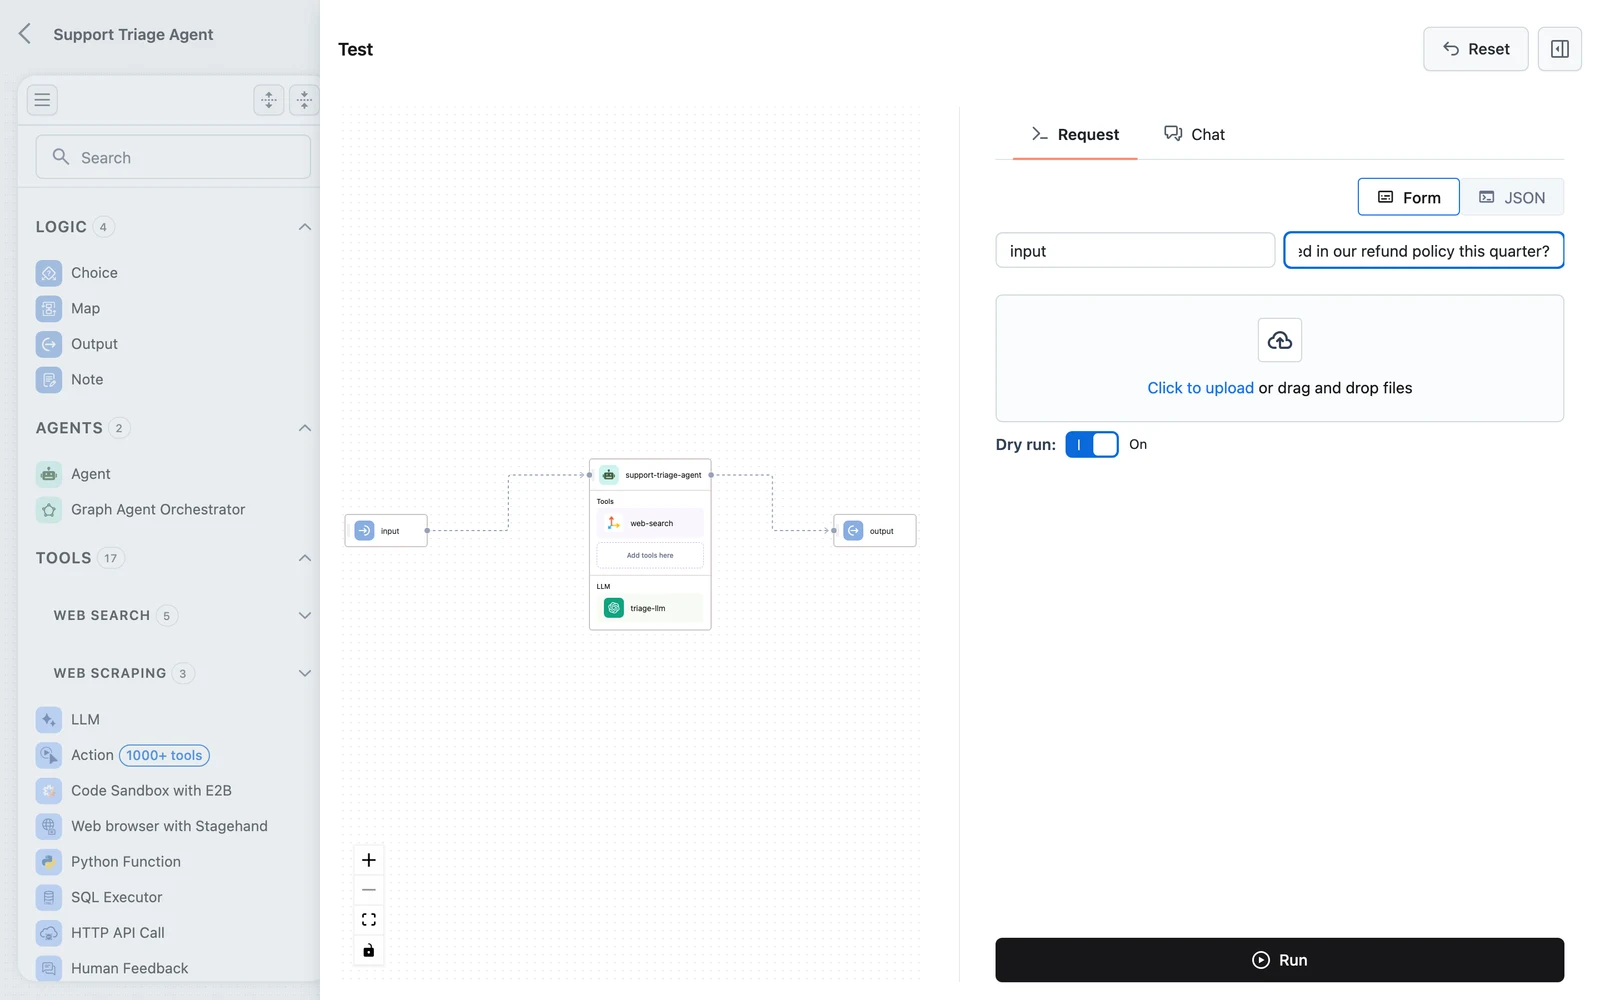
Connect Input → Agent → Output
Drag from the small handle on the right edge of the Input node to the handle on the left edge of the Agent node. Repeat from the Agent's right handle to the Output node's left handle.
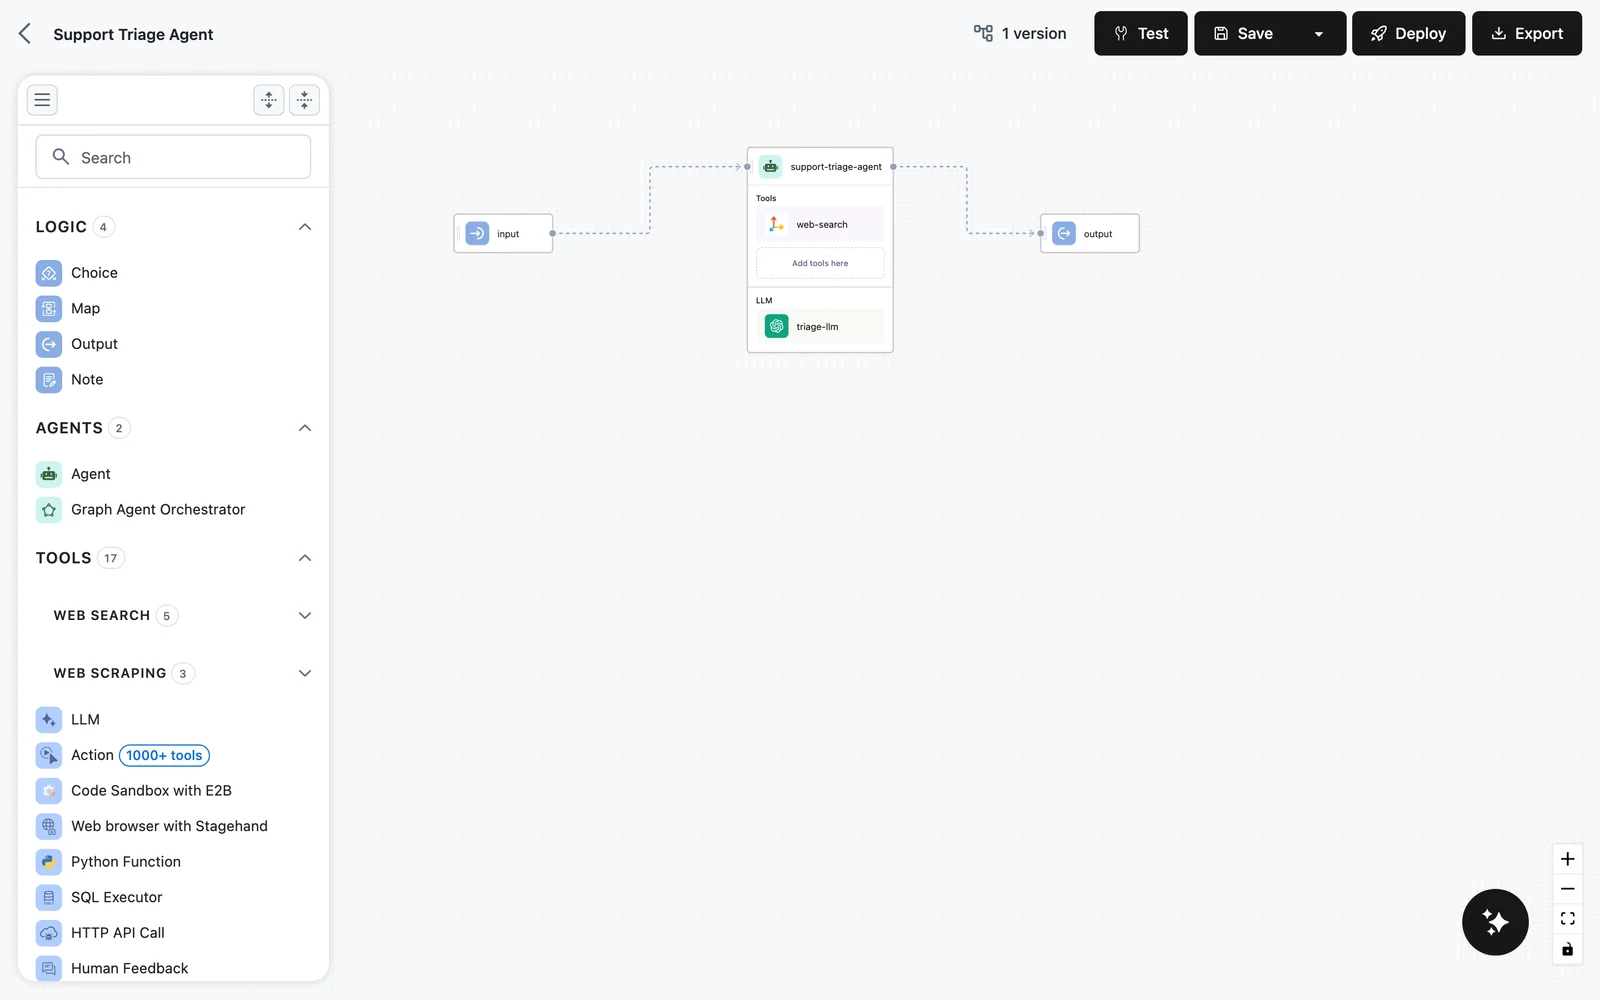
Edges set execution order and, just as importantly, decide which variables each node can see: a node's variable picker only offers outputs from nodes upstream of it. If you skip the Input → Agent edge, the agent cannot reference the request fields.
Configure the agent
Click the Agent node (its header, not the LLM inside) to open the inspector. On the CONFIGURATION tab:
- Set a Name — this name is how other nodes reference the agent's outputs (for example
$.agent.output.content). - Fill Role & Instructions with what the agent should do, for example: "You are a concise research assistant. Answer the user's question directly."
- Map the agent's Input field: click into the field and press
/to open the variable picker, then choose the Input node'sinputfield. The selector$.input.output.inputis inserted as a token.
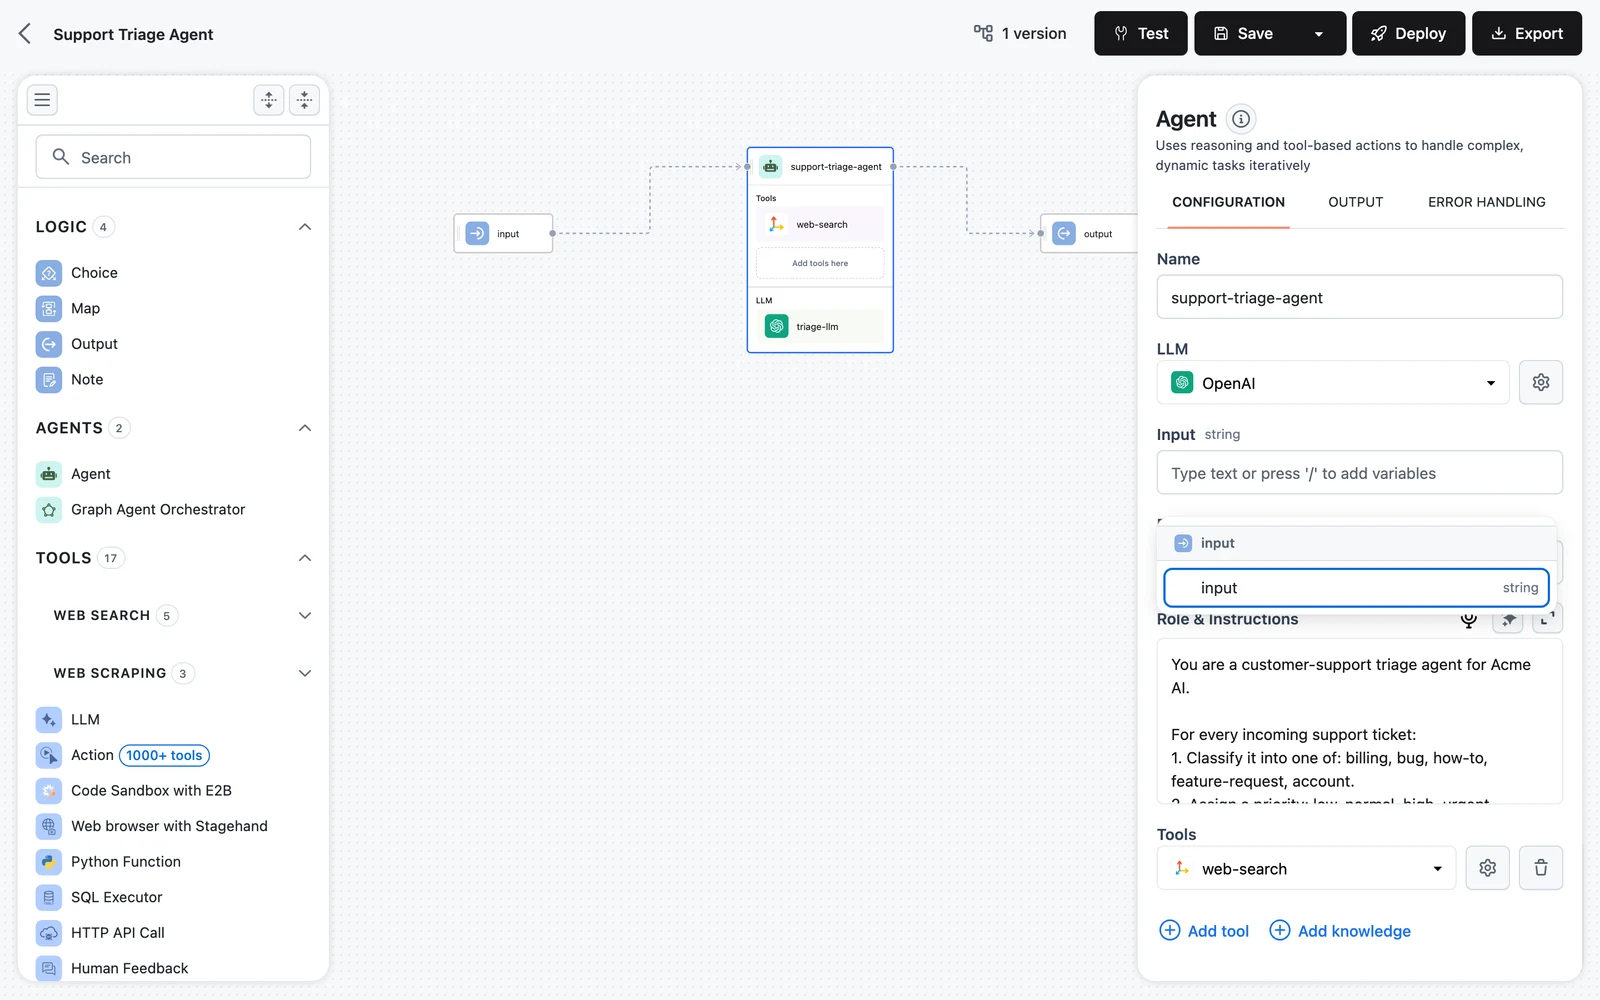
The field placeholder tells you the rule: "Type text or press '/' to add variables". A field holds either a variable token or literal text — clear the text to insert a variable.
Map the Output node
Click the Output node. Its panel lists the Output node fields — by default output (Required) and files. For the output field, open the variable picker and select your agent's content output. This writes the selector $.agent.output.content (using your agent's name).
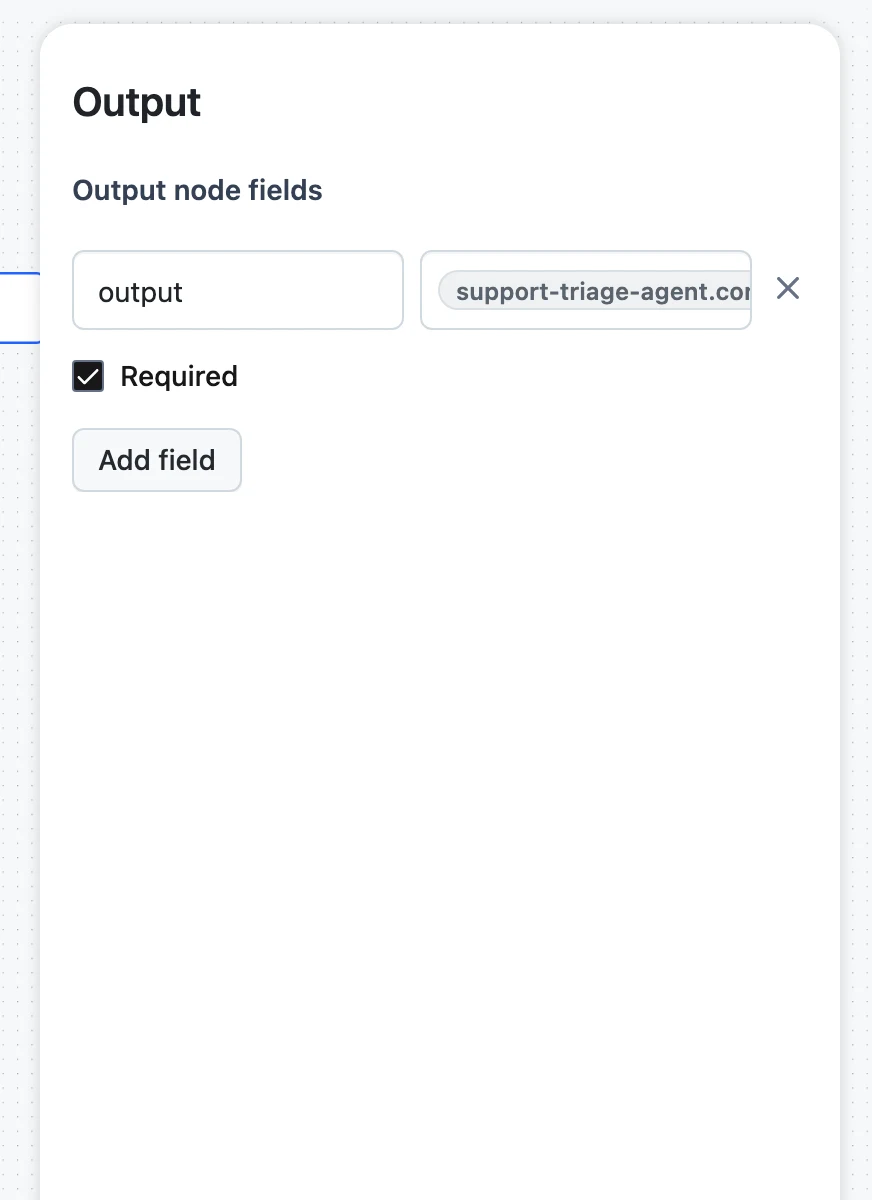
This mapping step is the one beginners skip most often. An edge into the Output node is not enough — every Output field gets its value from the selector you choose here.
Test-run it
Click Test in the toolbar. The test panel has two tabs: Request (a form generated from your Input node's fields) and Chat (a conversational view). On the Request tab, type a question into the input field and run.
Inspect the trace
When the run finishes, the panel shows the execution trace: every node that ran, with its input, output, and timing. Click the Agent node in the trace to see the prompt it built and the content it produced; click the Output node to confirm your mapping delivered the agent's answer into output.
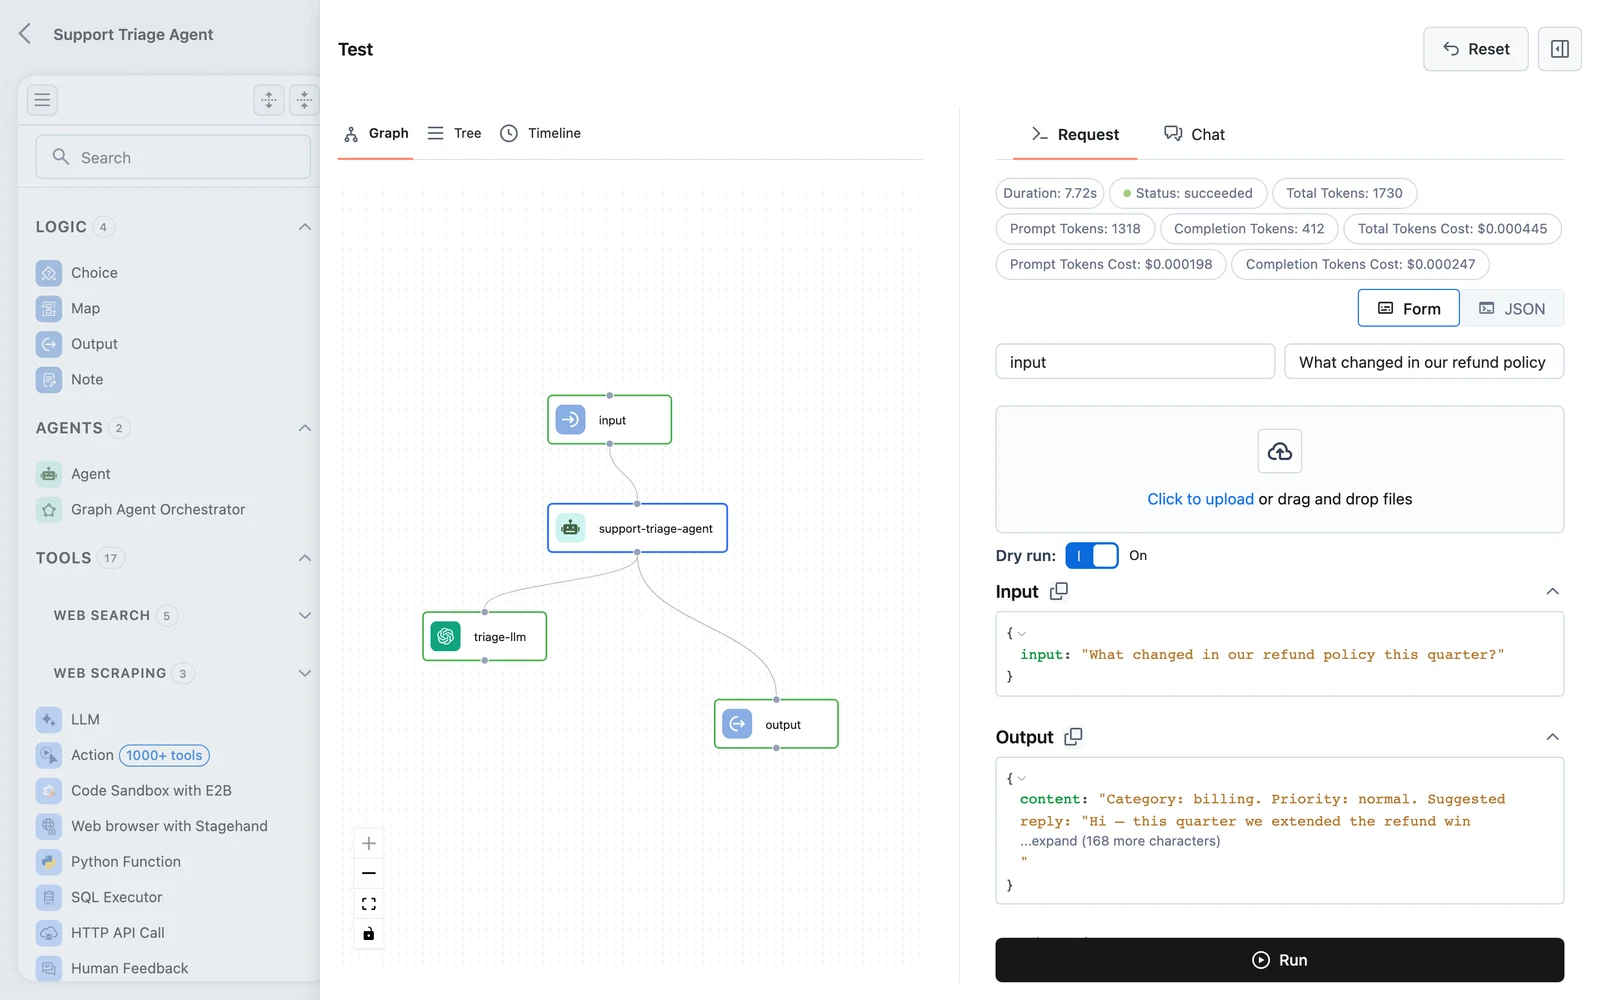
If output is empty, the mapping in the previous step is wrong or missing. See Testing and debugging workflows for more trace-reading techniques.
Save and release
Click Save. The save panel shows the version about to be created — v1 for a new workflow — and asks for a Name and Description. Click Create.
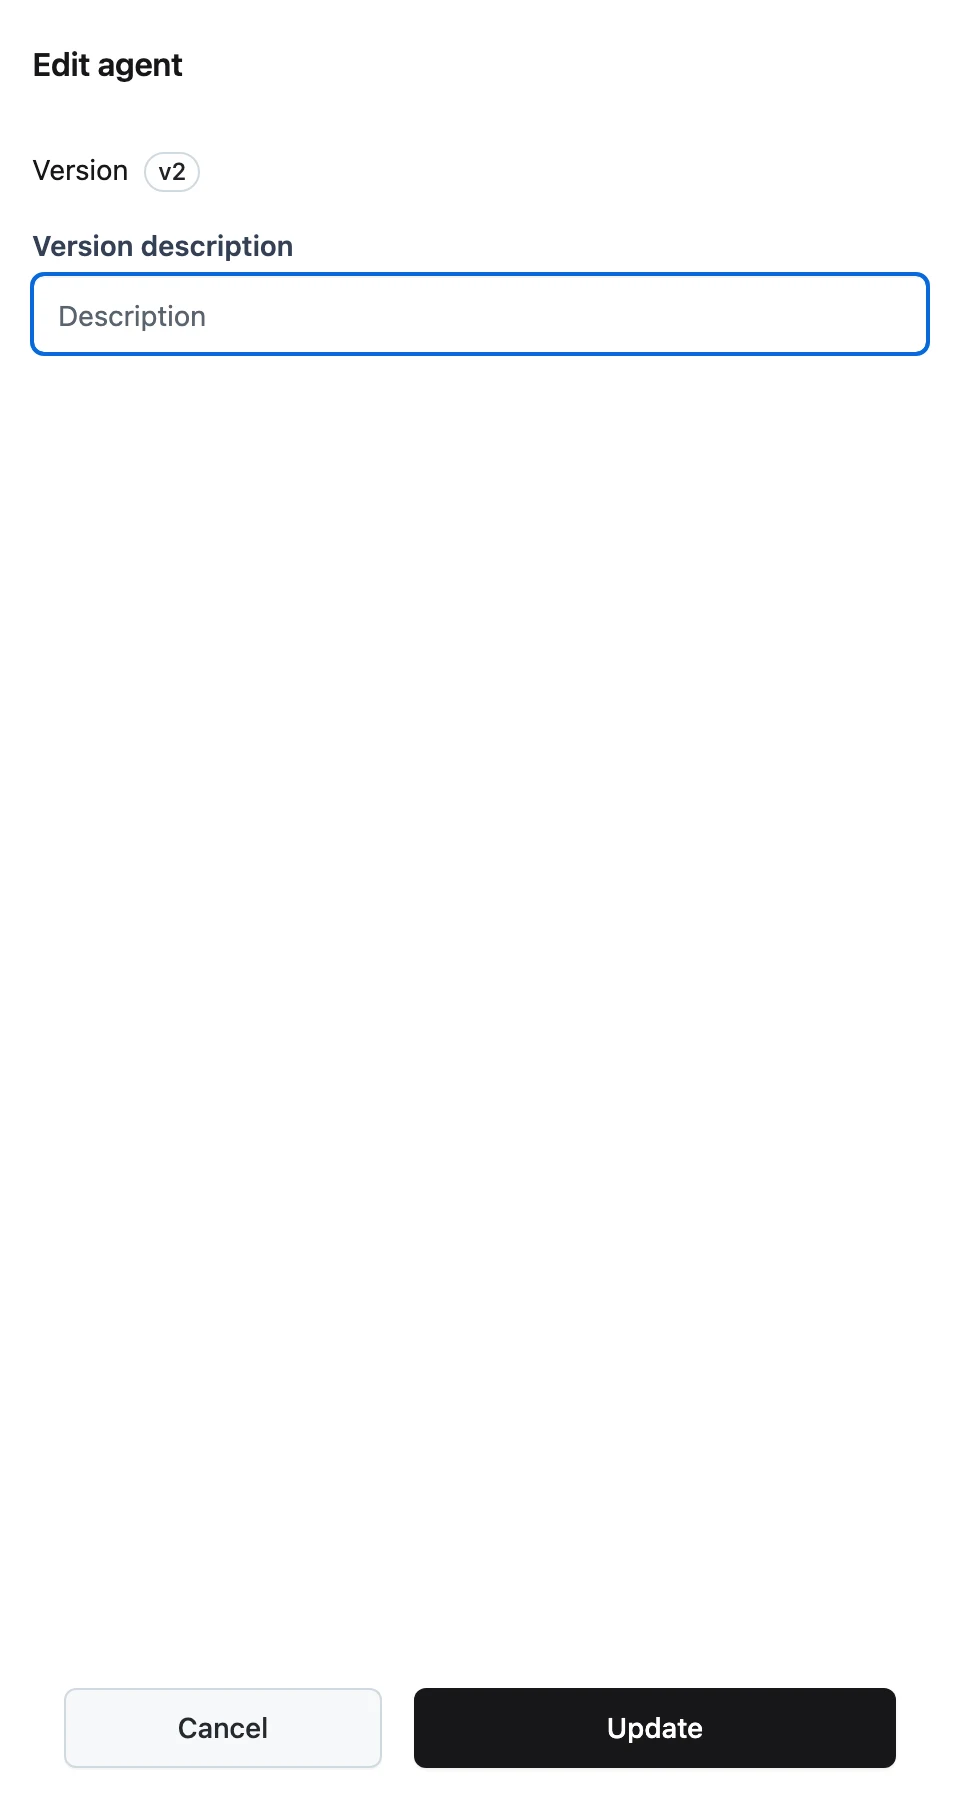
If validation fails you'll see "Your workflow has errors. You need to fix them before saving." — nodes with problems are outlined in red on the canvas.
Every subsequent Save creates the next version (v2, v3, …). The saved version is a Release that Apps can pin to.
Deploy (optional)
With at least one saved version, the Deploy button becomes active. Deploying creates an App — a hosted endpoint you can call over HTTP. Follow Deploy a Workflow App, then call it.
What you built
Input (input: Any, files: Files)
  └─► Agent  [LLM inside; input ⇐ $.input.output.input]
        └─► Output (output ⇐ $.agent.output.content)
Three ideas carry over to every workflow you build from here:
- Edges = order + visibility. A node can only reference outputs of nodes upstream of it.
- Data moves through mappings. Each input field and each Output field picks its source explicitly.
- Save = version. Test as often as you like; only Save creates a release.