Chat Widget & Assistant
Embed the Dynamiq chat widget in your site or share a standalone Chat Assistant URL — no custom frontend required.
Every deployed App ships with two ready-made chat surfaces on its Integration tab: an embeddable Chat Widget for your own website or product, and a hosted Chat Assistant page you can share as a link. Both talk to the App's endpoint directly, so anything your workflow can do — streaming, memory, file handling — works out of the box.
Authentication model
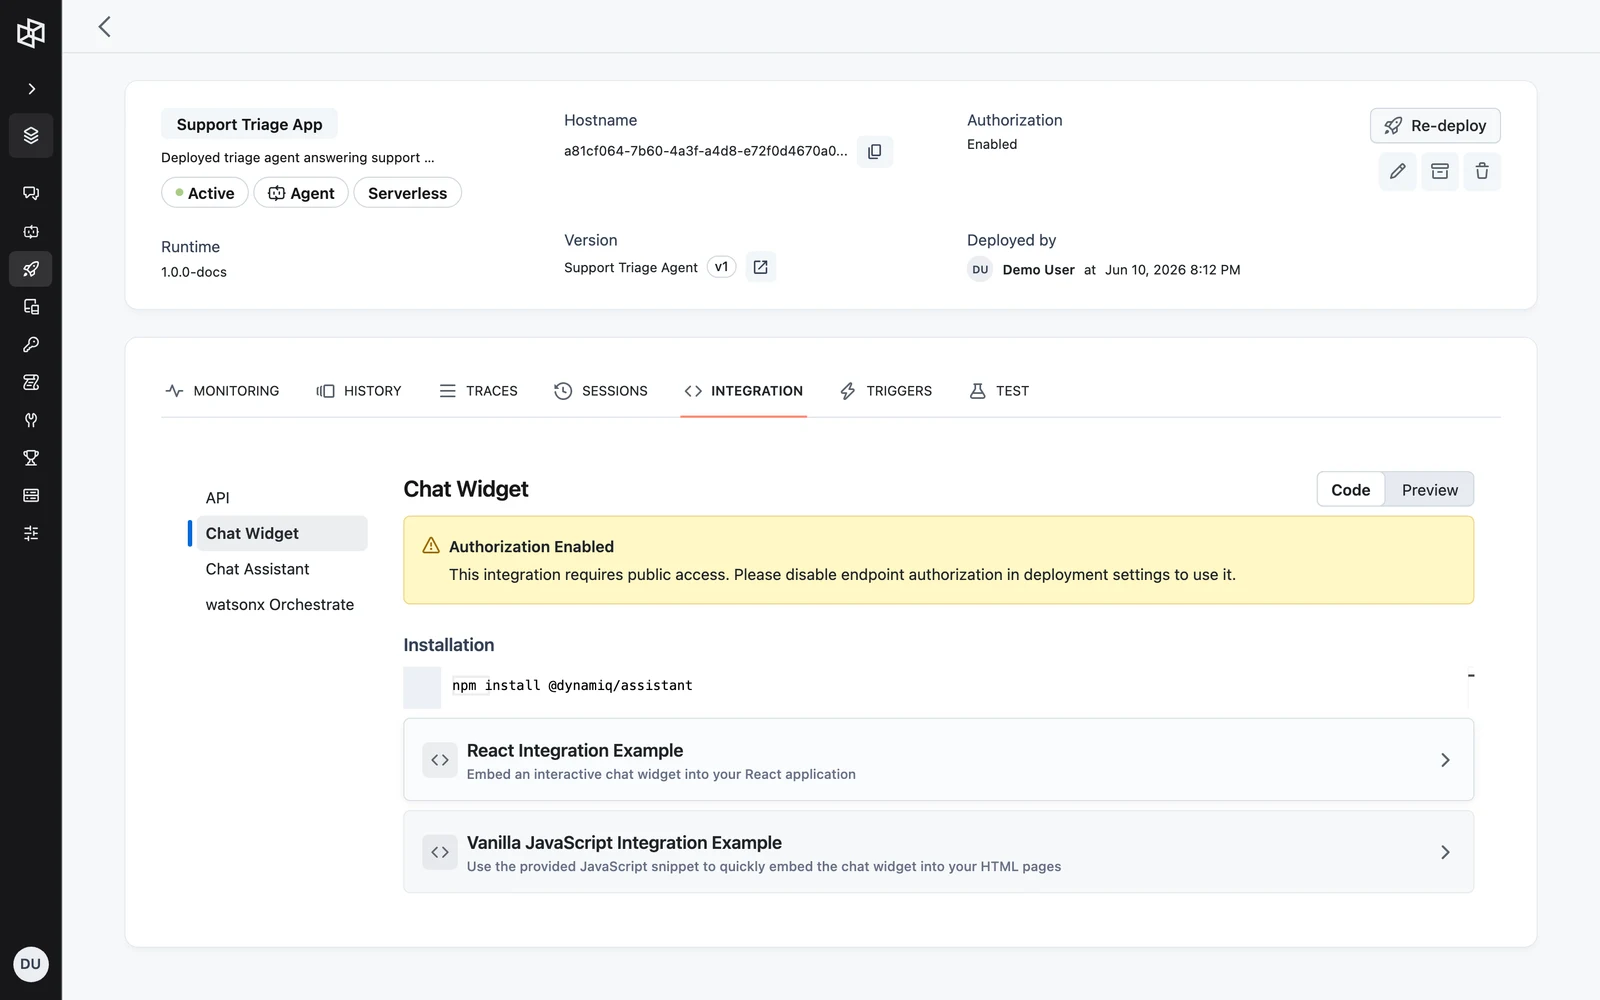
The widget and the assistant run in the end user's browser and do not attach an Access Key to requests. They therefore require the App's endpoint to be publicly accessible. If endpoint authorization is enabled (access type private), both tabs show an Authorization Enabled warning: "This integration requires public access. Please disable endpoint authorization in deployment settings to use it."
Embed the chat widget
Open the Chat Widget section
Go to Deployments, open your App, select the Integration tab, then choose Chat Widget in the left navigation. Use the Code / Preview toggle to switch between the embed snippets and a live preview of the widget running against your App.
Install the package
For React apps, install the assistant package:
npm install @dynamiq/assistantFor plain HTML pages, skip this step — the vanilla snippet loads the browser bundle from a CDN.
Add the widget to your app
Copy the snippet from the Integration tab (it comes pre-filled with your App's URL), or adapt one of these:
import { DynamiqAssistant } from '@dynamiq/assistant/react';

const App = () => {
  return (
    <DynamiqAssistant
      title="Dynamiq Assistant"
      placeholder="Type your message..."
      position="bottom-right"
      api={{
        url: 'https://<your-app-hostname>',
        streaming: true,
      }}
      allowFileUpload={true}
      maxFileSize={10 * 1024 * 1024} // 10MB
      acceptedFileTypes="image/*,.pdf,.doc,.docx,.txt"
      params={{
        userId: '123',
        sessionId: '234',
        userName: 'John Doe',
        language: 'en',
      }}
      prompts={[
        { icon: '🚀', text: 'How do I deploy and call my first agent?' },
        { icon: '📚', text: 'How do I create a knowledge base?' },
        { icon: '🛠️', text: 'How do I use MCP tools with an agent?' }
      ]}
      footerText={
        'Powered by <a href="https://getdynamiq.ai" target="_blank">Dynamiq</a>'
      }
    />
  );
};<script src="https://cdn.jsdelivr.net/npm/@dynamiq/assistant@latest/dist/index.browser.js"></script>
<script>
const assistant = new dynamiq.DynamiqAssistant(
'#dynamiq-assistant-container',
{
title: 'Dynamiq Assistant',
placeholder: 'Type your message...',
position: 'bottom-left',
api: {
url: 'https://<your-app-hostname>',
streaming: true,
},
}
);
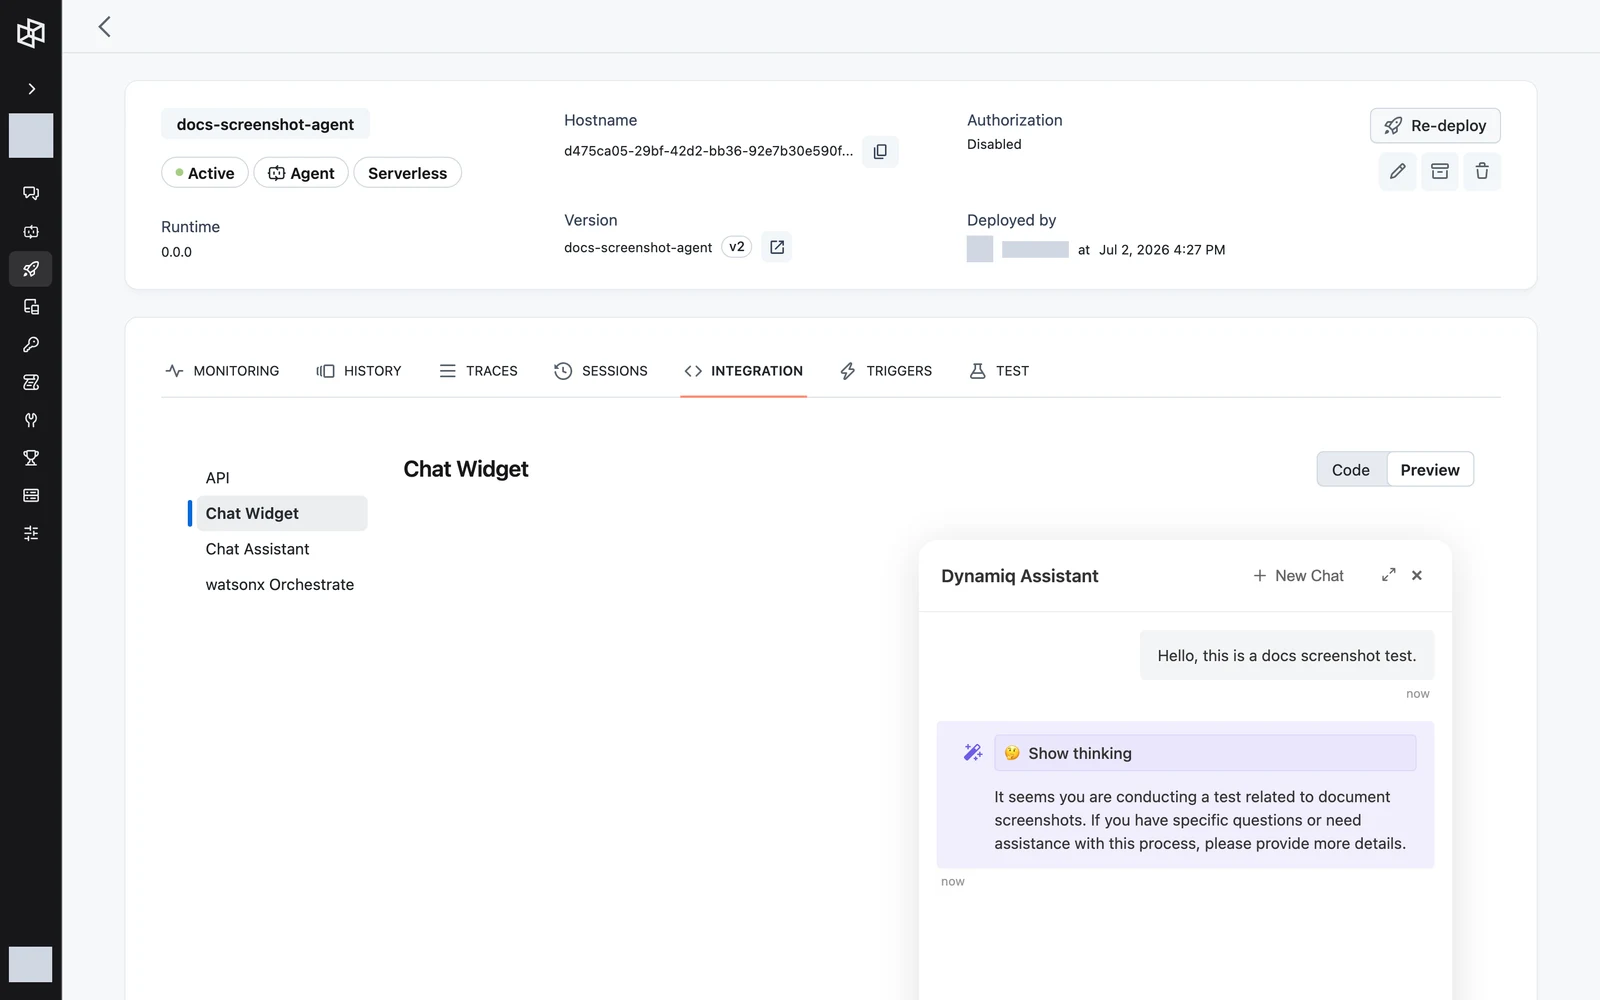
</script>Verify in the preview
Switch the Integration tab to Preview and send a message. The preview talks to the same App endpoint as your embed will, so responses on your site will match.
Customization options
| Option | Type | What it does |
|---|---|---|
title | string | Header text of the chat window. |
placeholder | string | Placeholder of the message input. |
position | string | Corner placement, e.g. bottom-right or bottom-left. |
api.url | string | Your App's endpoint URL. |
api.streaming | boolean | Stream responses token by token over SSE. |
allowFileUpload | boolean | Let users attach files to messages. |
maxFileSize | number | Maximum upload size in bytes. |
acceptedFileTypes | string | Accepted file types, e.g. image/*,.pdf,.doc,.docx,.txt. |
allowFullScreen | boolean | Show a control to expand the widget to full screen. |
params | object | Values forwarded with every run: userId, sessionId, userName, language. |
prompts | array | Suggested starter prompts, each with icon and text. |
footerText | string | HTML rendered below the input. |
The params.userId and params.sessionId values are how widget conversations become sessions — they appear on the App's Sessions tab and in the sessions API. See Conversations & Sessions.
Share the standalone Chat Assistant
The Chat Assistant is a hosted chat page for your App — useful for internal tools, demos, and stakeholder reviews where embedding is overkill.
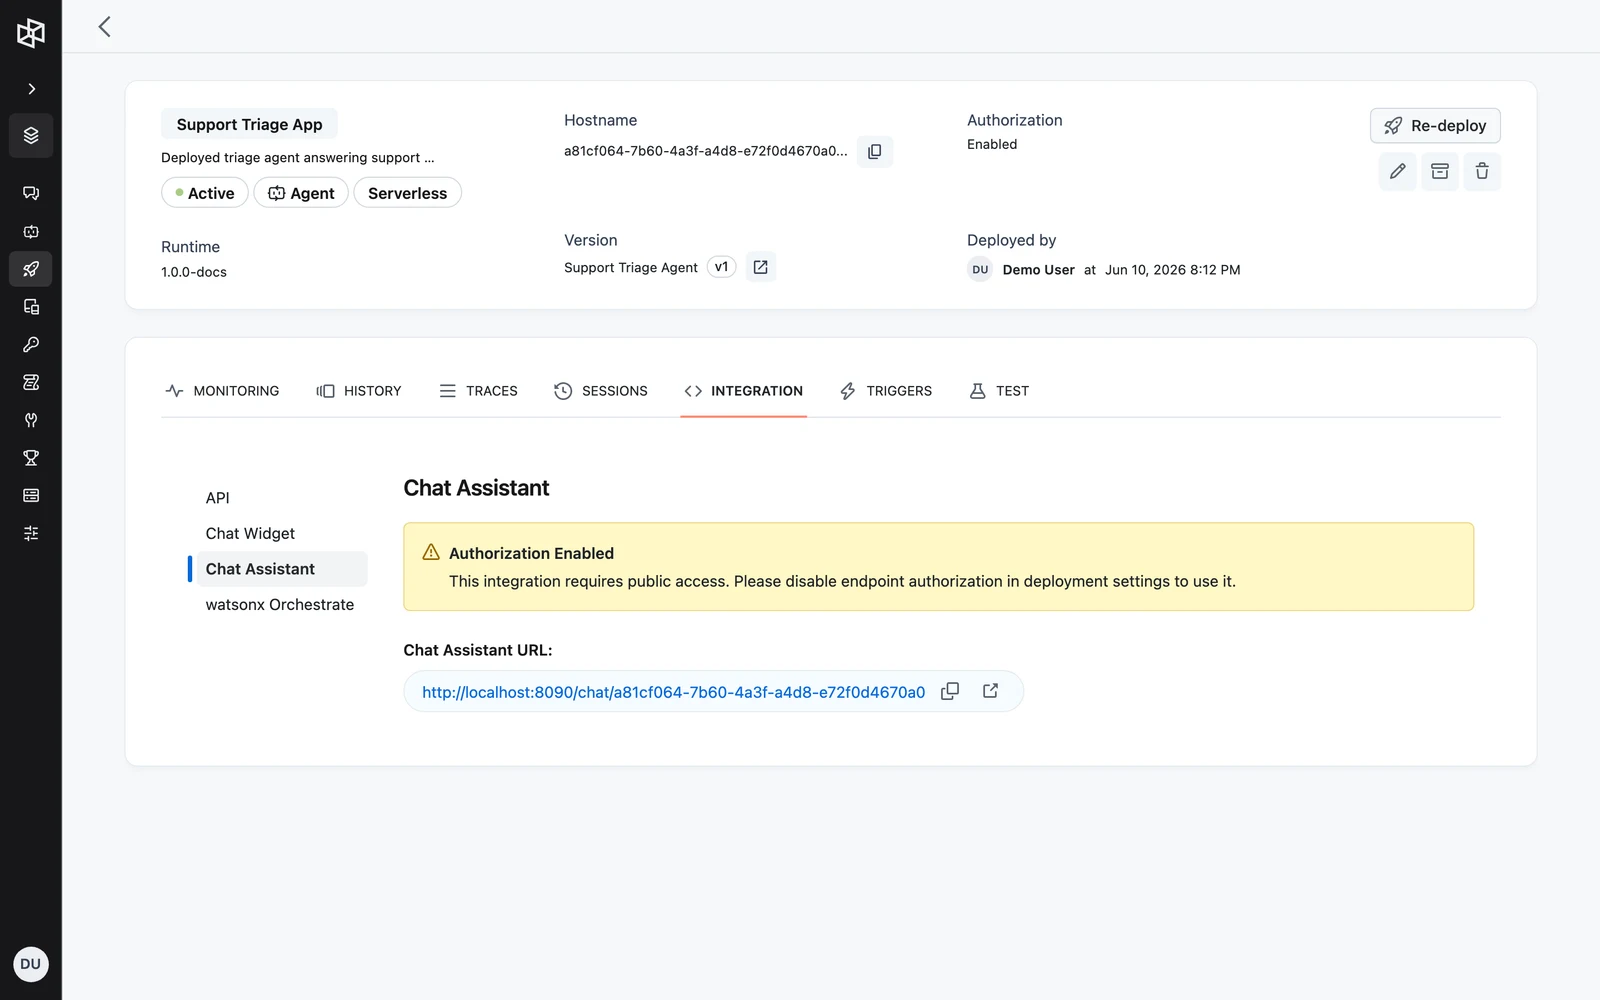
Copy the Chat Assistant URL
On the Integration tab, choose Chat Assistant in the left navigation. The page shows the Chat Assistant URL in the form:
https://<your-dynamiq-host>/chat/<app-id>Use the copy button or open it directly in a new tab.
Chat with your App
The assistant page renders a conversation thread with a message composer, a New chat button to clear the conversation, and a Stream toggle that switches between SSE streaming and plain HTTP responses.
The standalone Chat Assistant page with the message thread, Stream toggle, and New chat button
screenshot: chat-assistant-app-conversation
Controlling streaming via the URL
Append the stream query parameter to pin the connection mode when sharing the link:
| URL | Behavior |
|---|---|
/chat/<app-id> | Default: SSE streaming |
/chat/<app-id>?stream=on | Force SSE streaming |
/chat/<app-id>?stream=off | Force plain HTTP (single response) |
Other chat integrations
The Integration tab also includes a watsonx Orchestrate walkthrough for connecting your App as an agent in IBM watsonx Orchestrate. That integration authenticates with a Dynamiq Access Key as the Bearer token and uses the App's OpenAI-compatible service URL https://<your-app-hostname>/v1/chat/completions.
Troubleshooting
Next steps
End-User Connection Requirements
Let each end user of a deployed App link their own account or credentials — define requirements at build time, detect unmet ones at run time, and fulfill them via the hosted connect page or the connect API.
Triggers
Invoke a deployed App automatically on a cron schedule, at a one-off time, or when an event arrives from a connected app such as Slack or email.