Database Deployments
Deploy a managed Weaviate vector database in one click, fetch its credentials, and wire it into workflows and Knowledge Bases.
A Vector Database deployment gives you a managed, single-tenant vector database with its own hostname and generated credentials, running on the platform's Kubernetes infrastructure. Use it as the vector store behind Knowledge Bases and retrieval nodes without operating the database yourself.
What you can deploy
The supported engine is Weaviate, currently at engine version 1.25.0. Each deployment is installed from a Helm chart with its own persistent storage, API-key authentication enabled, and anonymous access disabled.
The engine picker in the UI also lists Qdrant, but selecting it opens an upgrade prompt — only Weaviate deployments can be created today, and the API accepts "engine": "weaviate" only.
Create a database deployment
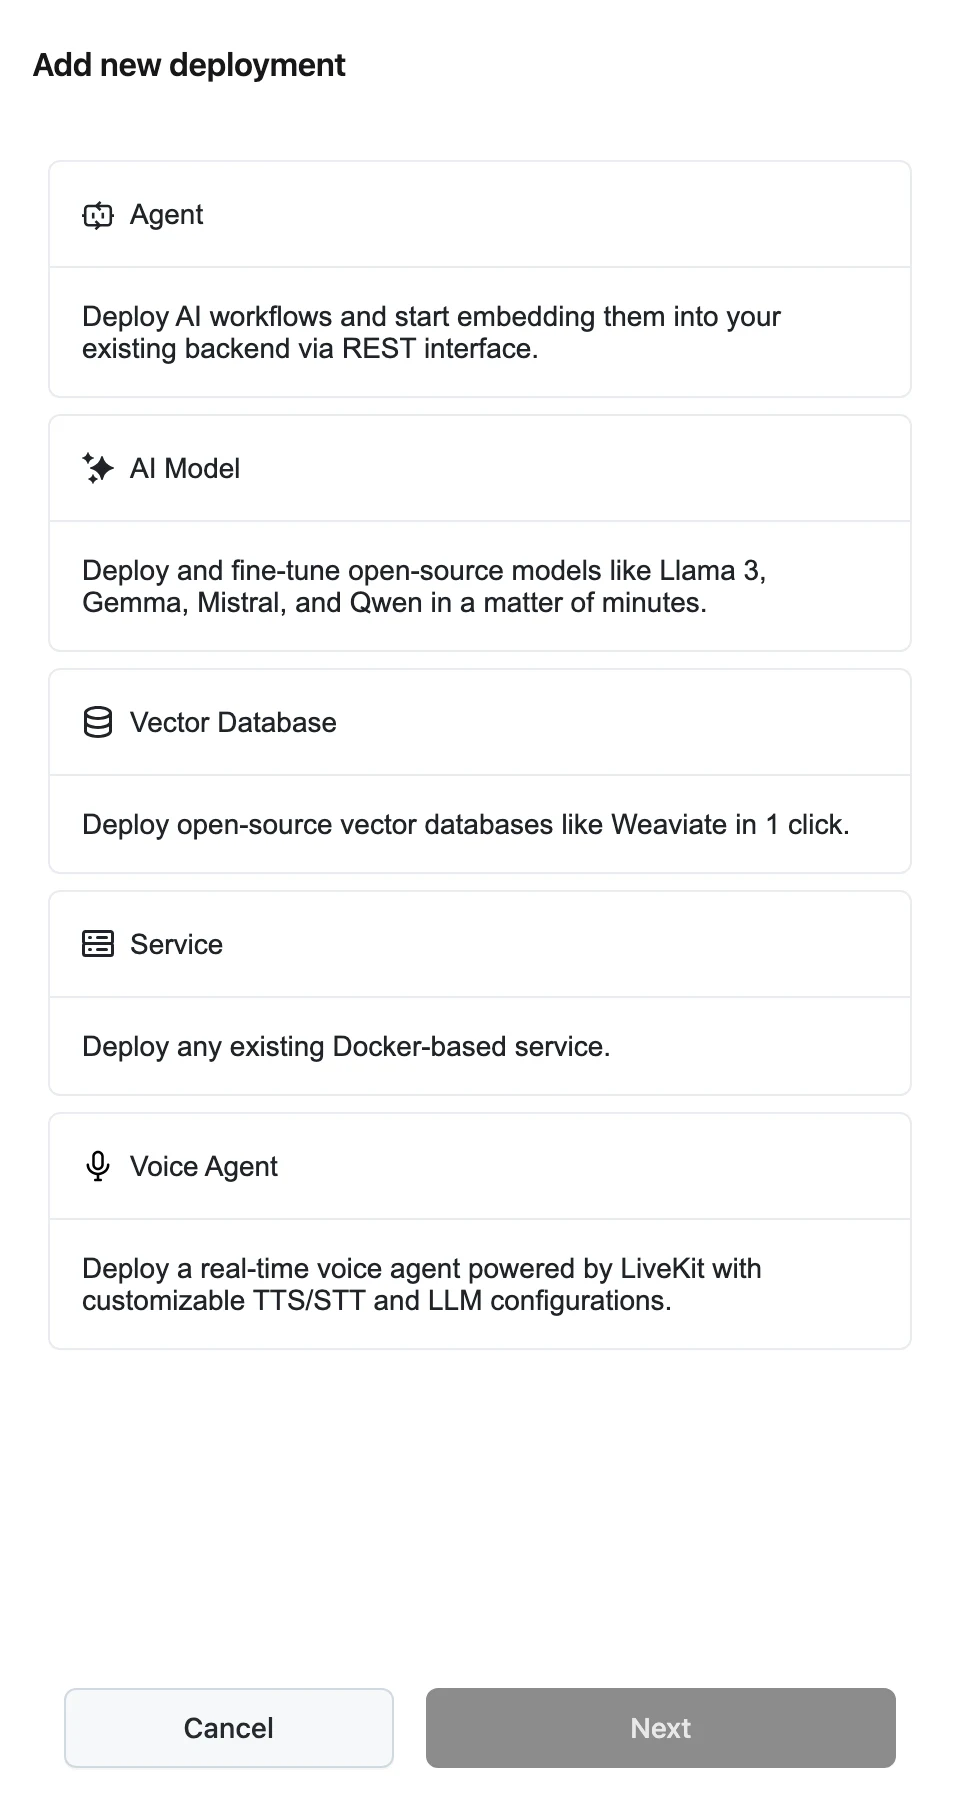
Pick the Vector Database type
On the Deployments page, click Add new deployment, select Vector Database ("Deploy open-source vector databases like Weaviate in 1 click."), and click Next.
Fill in the deployment form
The Add new deployment panel asks for:
- Name and Description.
- Engine — Weaviate.
- Engine version — 1.25.0.
- Resource profile — the compute the database runs on.
- Advanced configuration — Replicas (defaults to 1) and Storage size (defaults to
10Gi), the size of the persistent volume backing the database.
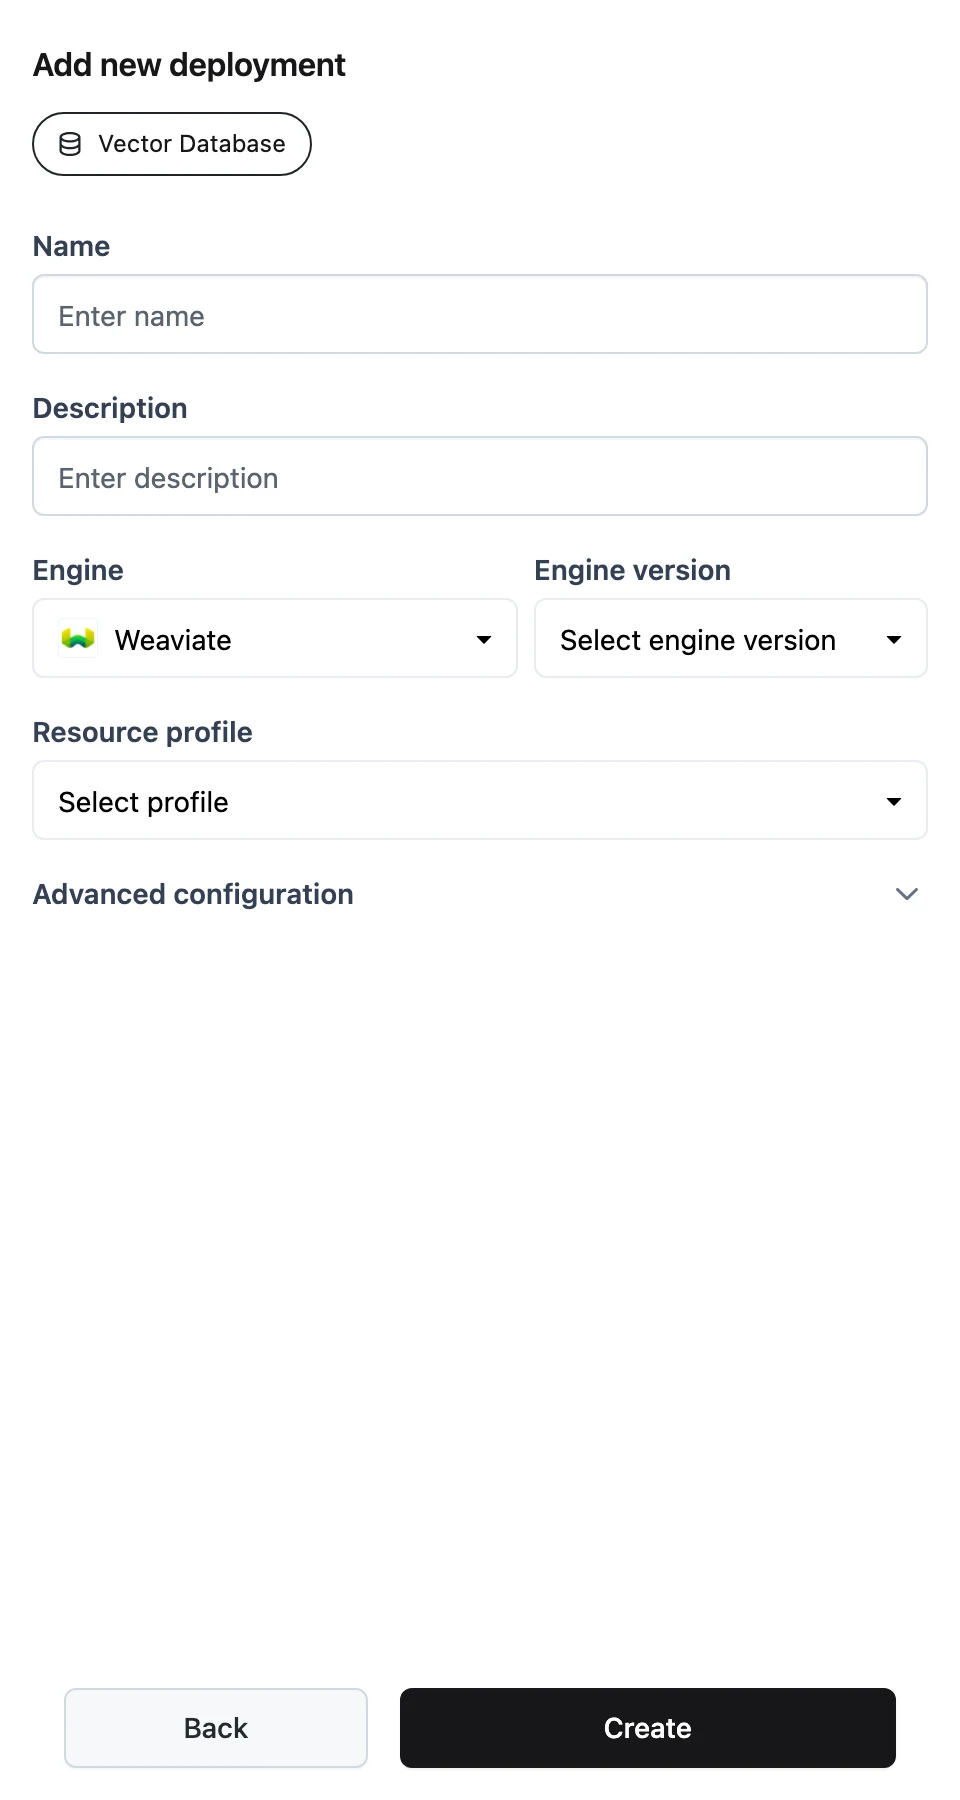
Create
Click Create. You see a "Vector database was created" confirmation and land on the database page. The deployment starts in pending status and is ready when it reaches running.
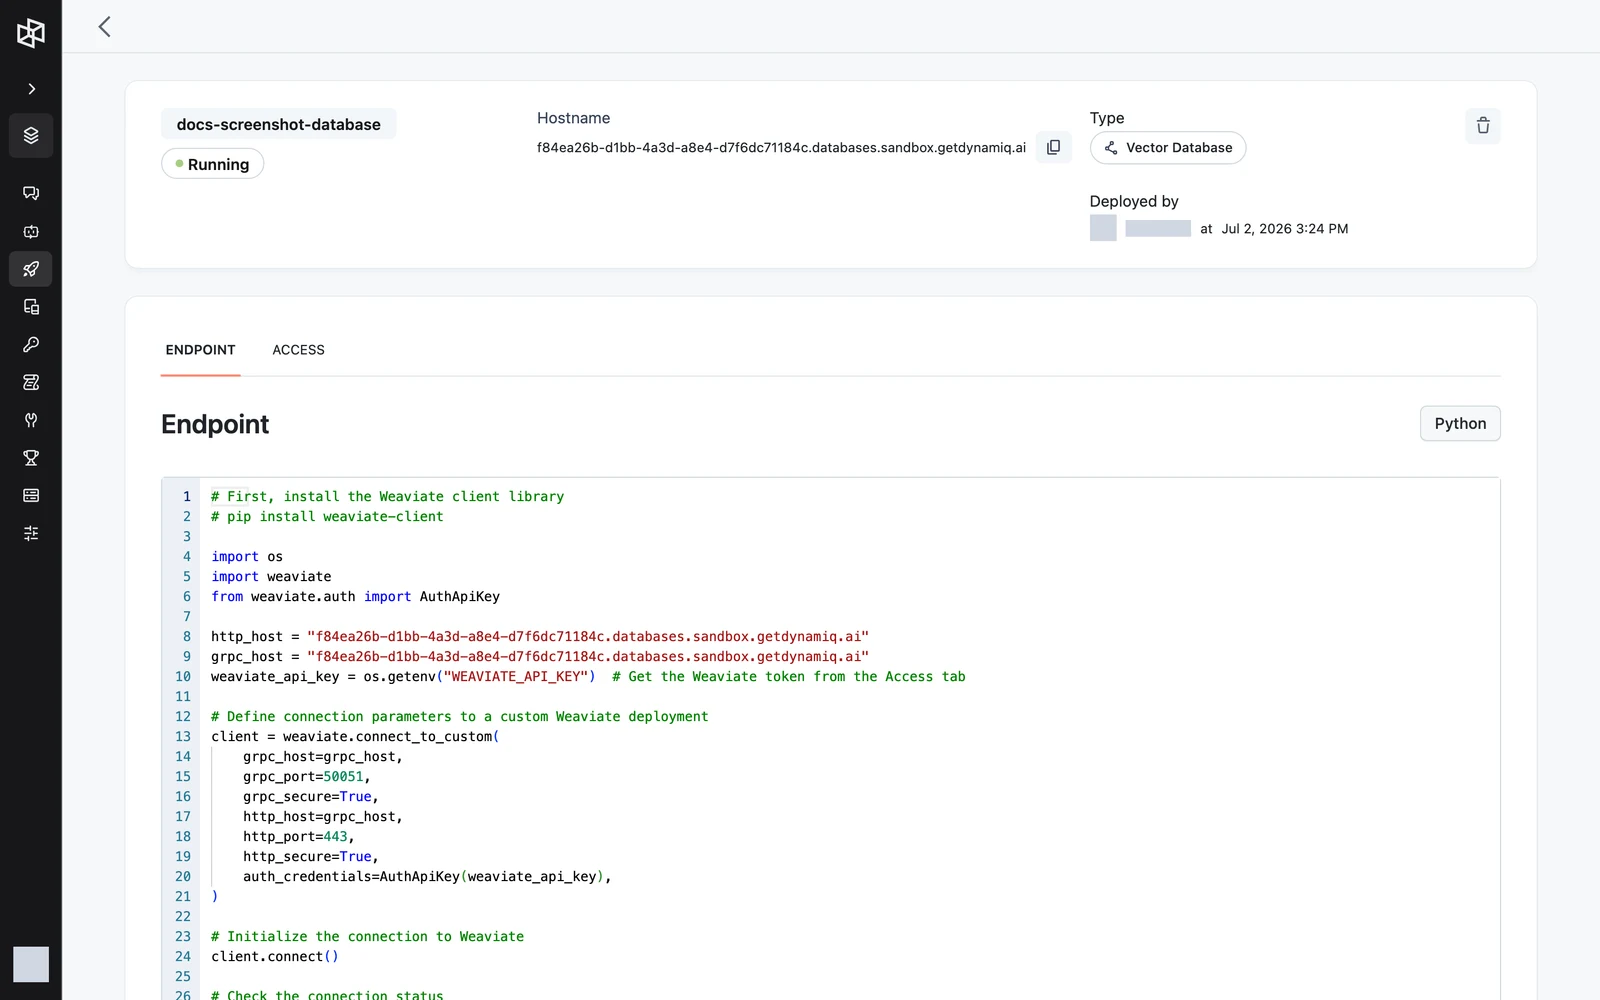
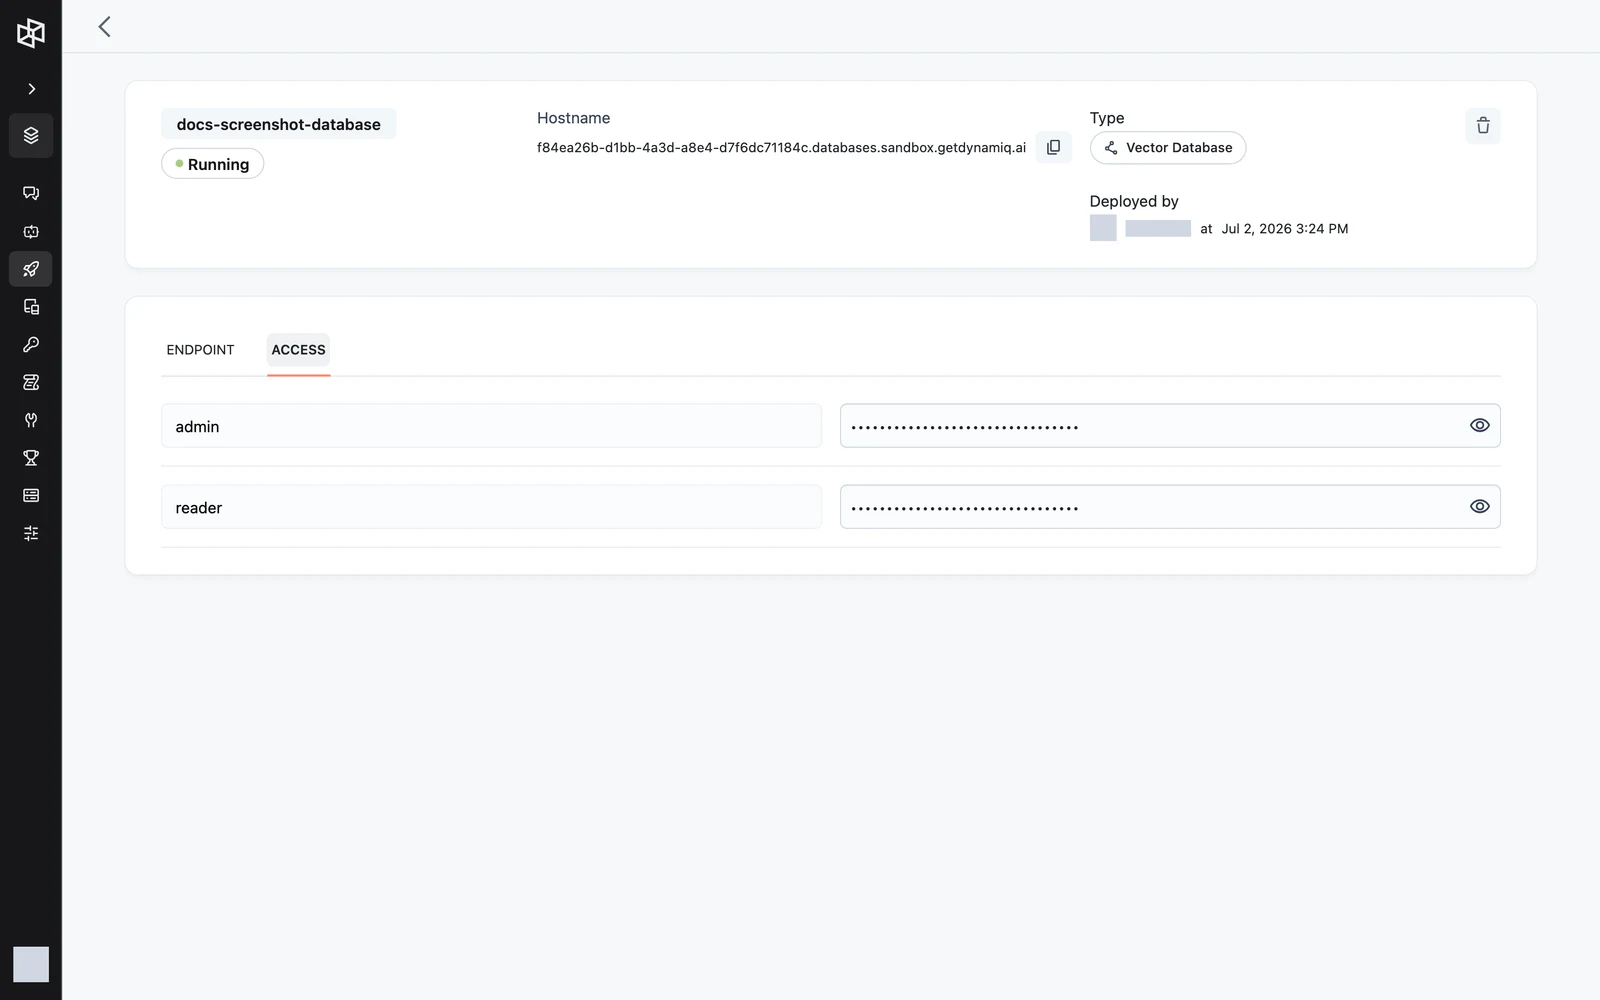
The database page
The header shows the deployment's name, status, Hostname (with a copy button), and Deployed by, plus a delete action. Two tabs sit below it:
- ENDPOINT — a ready-to-copy Python snippet that connects to the deployment with the official Weaviate client, prefilled with your hostname.
- ACCESS — the deployment's credentials: each user with a reveal/copy control for its API key.
Connection details and credentials
Every database deployment exposes:
| HTTP endpoint | https://<your-database-hostname> on port 443 |
| gRPC endpoint | the same hostname on port 50051 |
| Authentication | API key (Weaviate API-key auth; anonymous access is disabled) |
Two users are generated at deploy time, each with its own random API key:
- admin — full read-write access.
- reader — read-only access.
Read them from the ACCESS tab, or via the API: GET /v1/databases/{database_id}/credentials returns {"data": {"credentials": {"users": [{"username": "...", "password": "..."}]}}}, where password is the user's API key. Credentials are excluded from all other database responses.
Connect from code
The ENDPOINT tab shows this pattern with your hostname filled in:
# pip install weaviate-client
import os
import weaviate
from weaviate.auth import AuthApiKey

hostname = "<your-database-hostname>"
weaviate_api_key = os.getenv("WEAVIATE_API_KEY")  # from the Access tab

client = weaviate.connect_to_custom(
    http_host=hostname,
    http_port=443,
    http_secure=True,
    grpc_host=hostname,
    grpc_port=50051,
    grpc_secure=True,
    auth_credentials=AuthApiKey(weaviate_api_key),
)

client.connect()
print(client.is_ready())
client.close()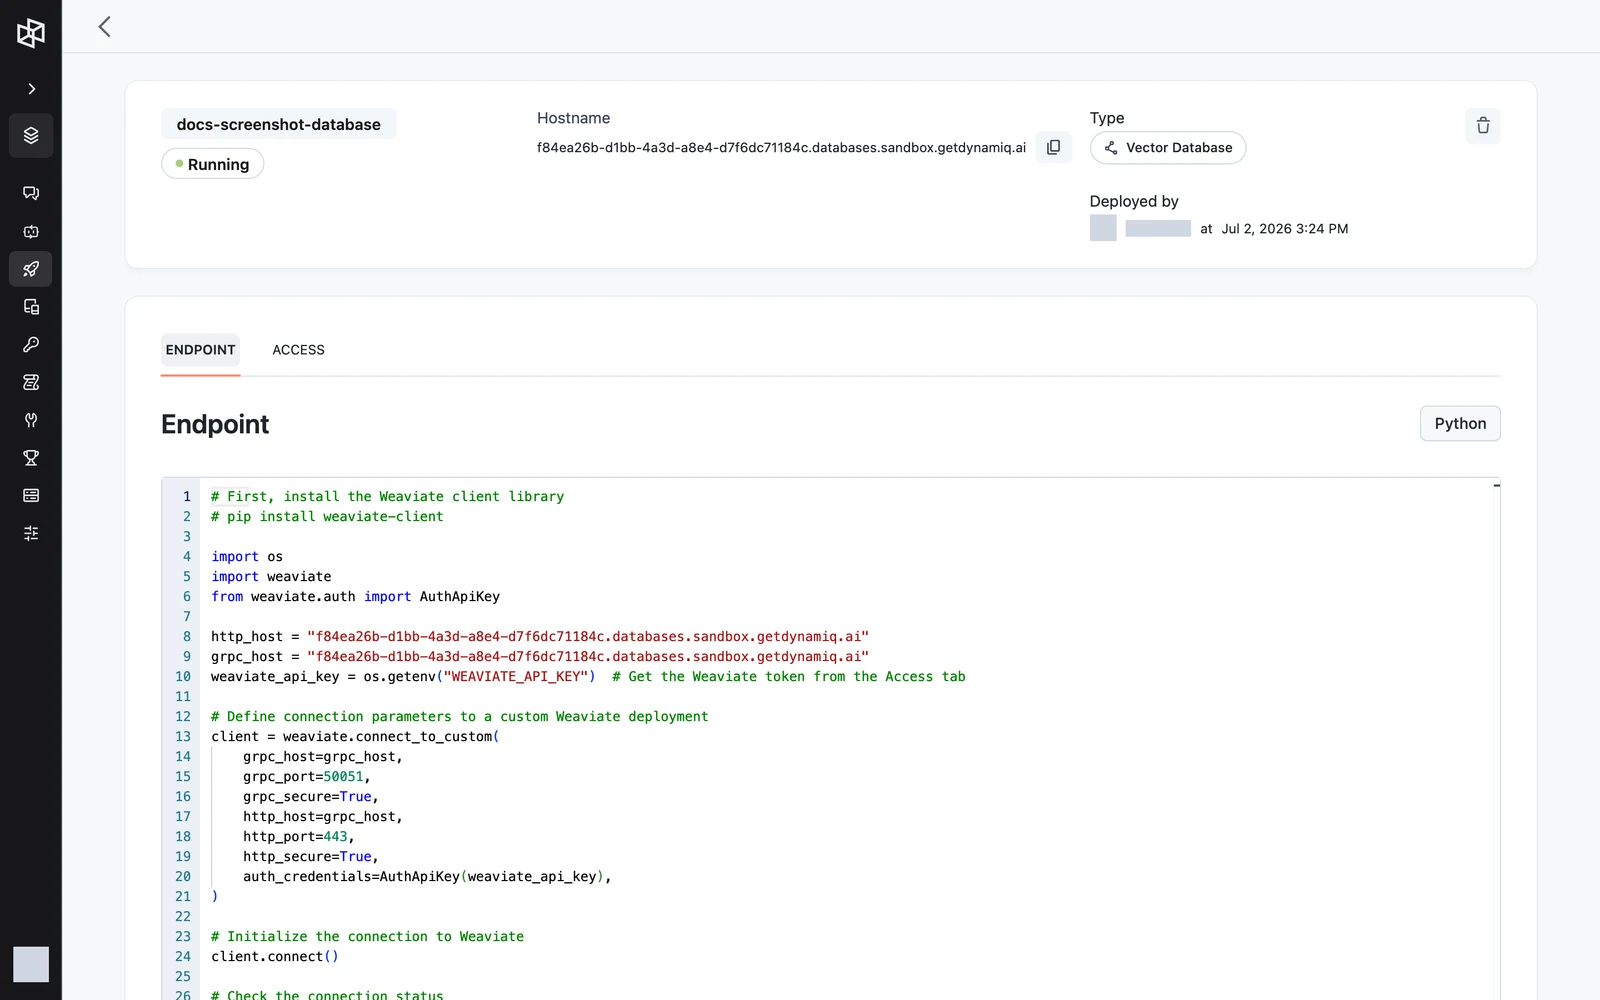
Use it from workflow Connections
To use the deployment in workflows and Knowledge Bases, create a Weaviate Connection that points at it:
- Create a new Connection of type Weaviate.
- Set the deployment type to Custom (not Weaviate Cloud).
- Fill in HTTP Host = your database hostname, HTTP Port =
443, gRPC Host = the same hostname, gRPC Port =50051. - Set API Key to the admin key from the ACCESS tab (use reader for read-only consumers).
The Connection then appears anywhere a Weaviate vector store can be selected — including as the storage backend of a Knowledge Base.
Manage via the management API
Database deployments are managed on https://api.getdynamiq.ai with a Personal Access Token:
| Method & path | What it does |
|---|---|
POST /v1/databases | Create a deployment (returns 201) |
GET /v1/databases?project_id={id} | List deployments in a project |
GET /v1/databases/{database_id} | Get one deployment |
GET /v1/databases/{database_id}/credentials | Get the generated users and API keys |
DELETE /v1/databases/{database_id} | Delete the deployment |
POST /v1/databases takes:
namestringrequireddescriptionstringproject_iduuidrequiredresource_profile_iduuidrequiredenginestringrequiredengine_versionstringrequiredparametersobjectrequiredcurl -X POST "https://api.getdynamiq.ai/v1/databases" \
-H "Authorization: Bearer $DYNAMIQ_PERSONAL_ACCESS_TOKEN" \
-H "Content-Type: application/json" \
-d '{
"name": "kb-vectors",
"project_id": "11111111-1111-1111-1111-111111111111",
"resource_profile_id": "22222222-2222-2222-2222-222222222222",
"engine": "weaviate",
"engine_version": "1.25.0",
"parameters": {"replicas": 1, "storage": {"size": "10Gi"}}
}'Deleting a database deployment uninstalls it and deletes its persistent volumes. The stored data is not recoverable — export anything you need first.
Next steps
Model Inference Deployments
Deploy open-source models on vLLM or LoRAX runtimes and call them through OpenAI-compatible chat, embeddings, and audio endpoints.
Service Deployments
Run any Docker container on Dynamiq — bring an image or a source bundle and get a hostname with Access Key auth, pods, logs, and traces.